User Guide
A practical walkthrough of Town OS — from writing a USB drive to reporting bugs. Whether you're a first-time user or a developer building packages, this guide covers everything you need to get started.
Creating the USB Drive
The Town OS USB image is built from the install repository. The build process produces a bootable image with a squashfs root filesystem and a GPT partition layout.
Prerequisites
You'll need a Linux system with the following tools installed:
make— the build is driven entirely by Makefilessquashfs-tools— for creating the compressed root filesystempartedandgdisk— for GPT partitioning- A USB drive (8 GB or larger recommended)
Cloning and Building
git clone https://gitea.com/town-os/install.git
cd install
make image
Running make or make image builds the complete USB image.
The process downloads the base system, installs Town OS components, compresses
everything into a squashfs filesystem, and assembles the final disk image with
a GPT partition table.
Partitioning and Squashfs
The resulting image uses a GPT layout with:
- An EFI system partition for booting
- A squashfs partition containing the compressed root filesystem
At boot time, Town OS mounts the squashfs as a read-only lower layer, with a tmpfs overlay on top. This means the OS runs entirely in RAM — the USB drive itself is only read at boot. All runtime changes happen in memory and are discarded on reboot, giving you a clean slate every time.
Writing the Image
Once the image is built, write it to your USB drive using dd:
# Find your USB device (e.g. /dev/sdb)
lsblk

# Write the image (replace /dev/sdX with your device)
sudo dd if=town-os.img of=/dev/sdX bs=4M status=progress conv=fsync
Double-check the target device — dd will overwrite whatever you point it at
without confirmation.
Setting Up DNS on Your Router
Town OS includes rolodex, a full DNS server with DNSSEC validation, ad blocking, and DANE support. To use it, you need to tell your router to hand out the Town OS machine's IP address as the DNS server for your network. This way every device on your network automatically uses rolodex for DNS — no per-device configuration needed.
Find Your Town OS IP Address
You'll need the local IP address of your Town OS machine. You can find it by:
- Checking the Town OS dashboard at
http://town-os.local - Running
make vm-ipif you're using a VM - Checking your router's DHCP client list for a device named "town-os"
For DNS to work reliably, your Town OS machine should have a static IP address or a DHCP reservation on your router. If the IP changes, DNS will break for your whole network.
Assign a Static IP or DHCP Reservation
Most routers let you reserve an IP address for a specific device based on its MAC address. This is usually found under LAN Settings, DHCP, or Address Reservation. Find the Town OS machine in the client list and reserve its current IP.
If your router doesn't support DHCP reservations, you can configure a static
IP on the Town OS machine itself by adding it to town-os.yaml.
Change the DNS Server in Your Router
The exact steps vary by router brand, but the general process is the same:
- Log in to your router's admin interface (usually
192.168.1.1or192.168.0.1) - Find the DHCP Settings, LAN Settings, or DNS Settings section
- Change the Primary DNS Server to your Town OS machine's IP address
- Optionally set a Secondary DNS Server as a fallback (e.g.
1.1.1.1or8.8.8.8) — this will be used if Town OS is unreachable - Save and apply the settings
After saving, devices on your network will pick up the new DNS server the next time they renew their DHCP lease. You can force this by disconnecting and reconnecting to the network, or by rebooting the device.
Common Router Interfaces
| Router Brand | Where to Find DNS Settings |
|---|---|
| ASUS | LAN → DHCP Server → DNS Server |
| TP-Link | DHCP → DHCP Settings → Primary DNS |
| Netgear | Internet → Domain Name Server (DNS) Address |
| Linksys | Connectivity → Local Network → DHCP Server → Static DNS |
| UniFi | Settings → Networks → (your network) → DHCP Name Server |
| pfSense / OPNsense | Services → DHCP Server → DNS Servers |
| OpenWrt | Network → Interfaces → LAN → DHCP Server → Advanced → DHCP-Options: 6,<town-os-ip> |
Verify It Works
After your device picks up the new DNS settings, verify that rolodex is handling your DNS queries:
# Check which DNS server your machine is using
nslookup example.com

# Or query Town OS directly
dig @<town-os-ip> example.com

# Test ad blocking — this should return NXDOMAIN or 0.0.0.0
dig @<town-os-ip> ads.doubleclick.net
If ads.doubleclick.net returns a blocked response, rolodex is working
and ad blocking is active for your network.
Building VMs from USB Images
The install repository includes scripts for launching Town OS in virtual machines, which is useful for testing and development without a physical USB drive.
QEMU
make qemuLaunches a QEMU VM with KVM acceleration, 4 IDE drives for storage testing, and bridge networking. The VM boots from the USB image and behaves identically to a physical installation.
VirtualBox
make virtualboxCreates a VirtualBox VM with bridged networking and converts the raw disk image to VDI format. Bridged mode lets the VM appear as a regular device on your network.
Auto-Detection
make runAutomatically detects your hypervisor — prefers QEMU if available, falls back to VirtualBox.
Environment Variables
| Variable | Default | Description |
|---|---|---|
IMAGE_SIZE | 8G | Size of the USB image |
VM_DISK_SIZE | 20G | Size of each virtual disk |
VM_MEMORY | 4096 | VM memory in MB |
VM_BRIDGE | br0 | Host bridge interface for networking |
Serial Console
# Attach to the VM serial console
make serial

# Or manually via socat
socat -,rawer,escape=0x1d unix-connect:/tmp/town-os-serial.sock

# Detach with Ctrl-]
Finding the VM
# Get the VM's IP address
make vm-ip

# Or connect via mDNS
ssh root@town-os.localRAID Installation and ZFS
Town OS supports multiple storage backends for redundancy and performance.
Configuration is driven by town-os.yaml, which can be placed on
the USB drive or provided at boot.
Configuration
# town-os.yaml
storage_backend: btrfs       # btrfs, btrfs-mdadm, or zfs
btrfs_raid_mode: auto        # auto, single, raid1, raid5
btrfs Native RAID
With storage_backend: btrfs, Town OS uses btrfs's built-in RAID
capabilities. In auto mode, the RAID level is selected based on
disk count:
- 1 disk — single mode (no redundancy)
- 2 disks — RAID 1 (mirroring)
- 3+ disks — RAID 5 (striping with parity)
btrfs with mdadm
With storage_backend: btrfs-mdadm, Town OS creates an md-raid array
first, then formats it with btrfs. This approach uses Linux's mature md-raid
implementation underneath btrfs, which some administrators prefer for its
proven reliability.
ZFS
With storage_backend: zfs, Town OS creates a ZFS pool with
automatic topology selection:
- 2 disks — mirror (equivalent to RAID 1)
- 3+ disks — RAID-Z (equivalent to RAID 5)
ZFS datasets are created for each package's volumes, and ZFS block volumes (zvols) are available for packages that need raw block devices.
Disk Detection
Town OS automatically detects available storage devices. It identifies NVMe drives, SATA/SAS drives, and SD cards, while excluding the boot USB device and any removable media. The detection logic ensures that Town OS never touches the drive it booted from.
Overlay Filesystem
Regardless of storage backend, Town OS uses overlay mounts for
/var and /etc persistence. The lower layer comes from
the squashfs root, while the upper layer lives on the RAID/ZFS storage.
This means system configuration and service data survive reboots while the
base OS remains immutable.
Using the User Interface
Town OS provides a clean web-based dashboard for managing your server. After booting,
open a browser and navigate to your Town OS machine's IP address or
http://town-os.local.
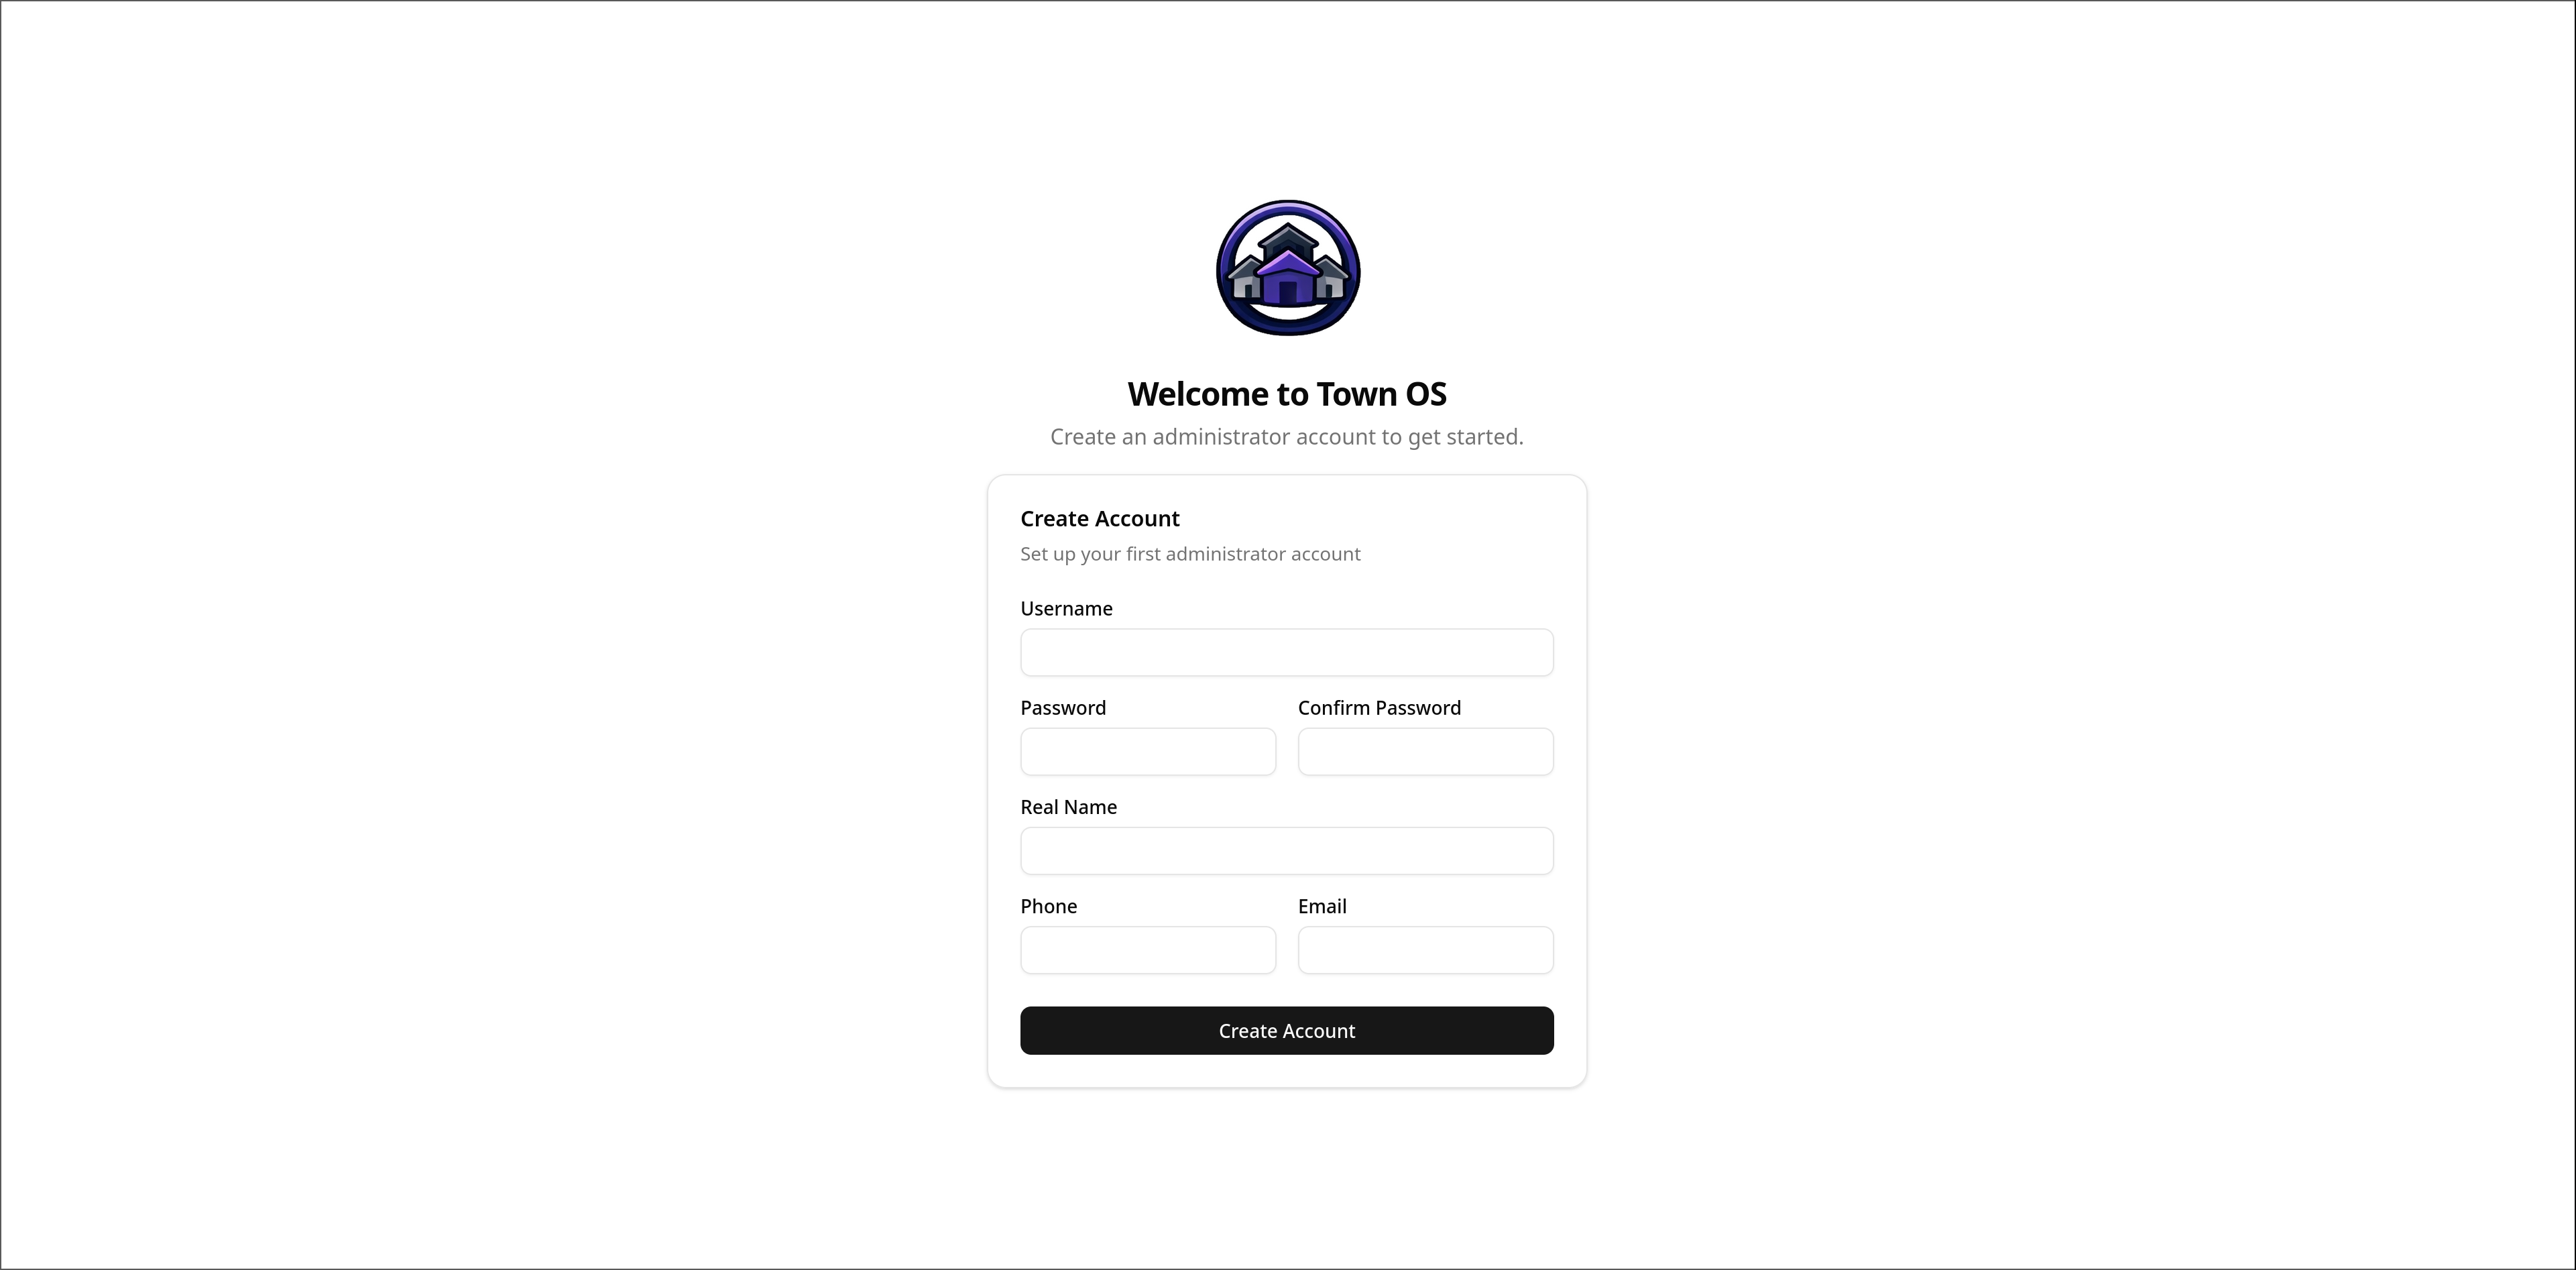
First Boot: Creating Your Account
On first boot, you'll be prompted to create an administrator account. Choose a username and password — this account has full control over the system.
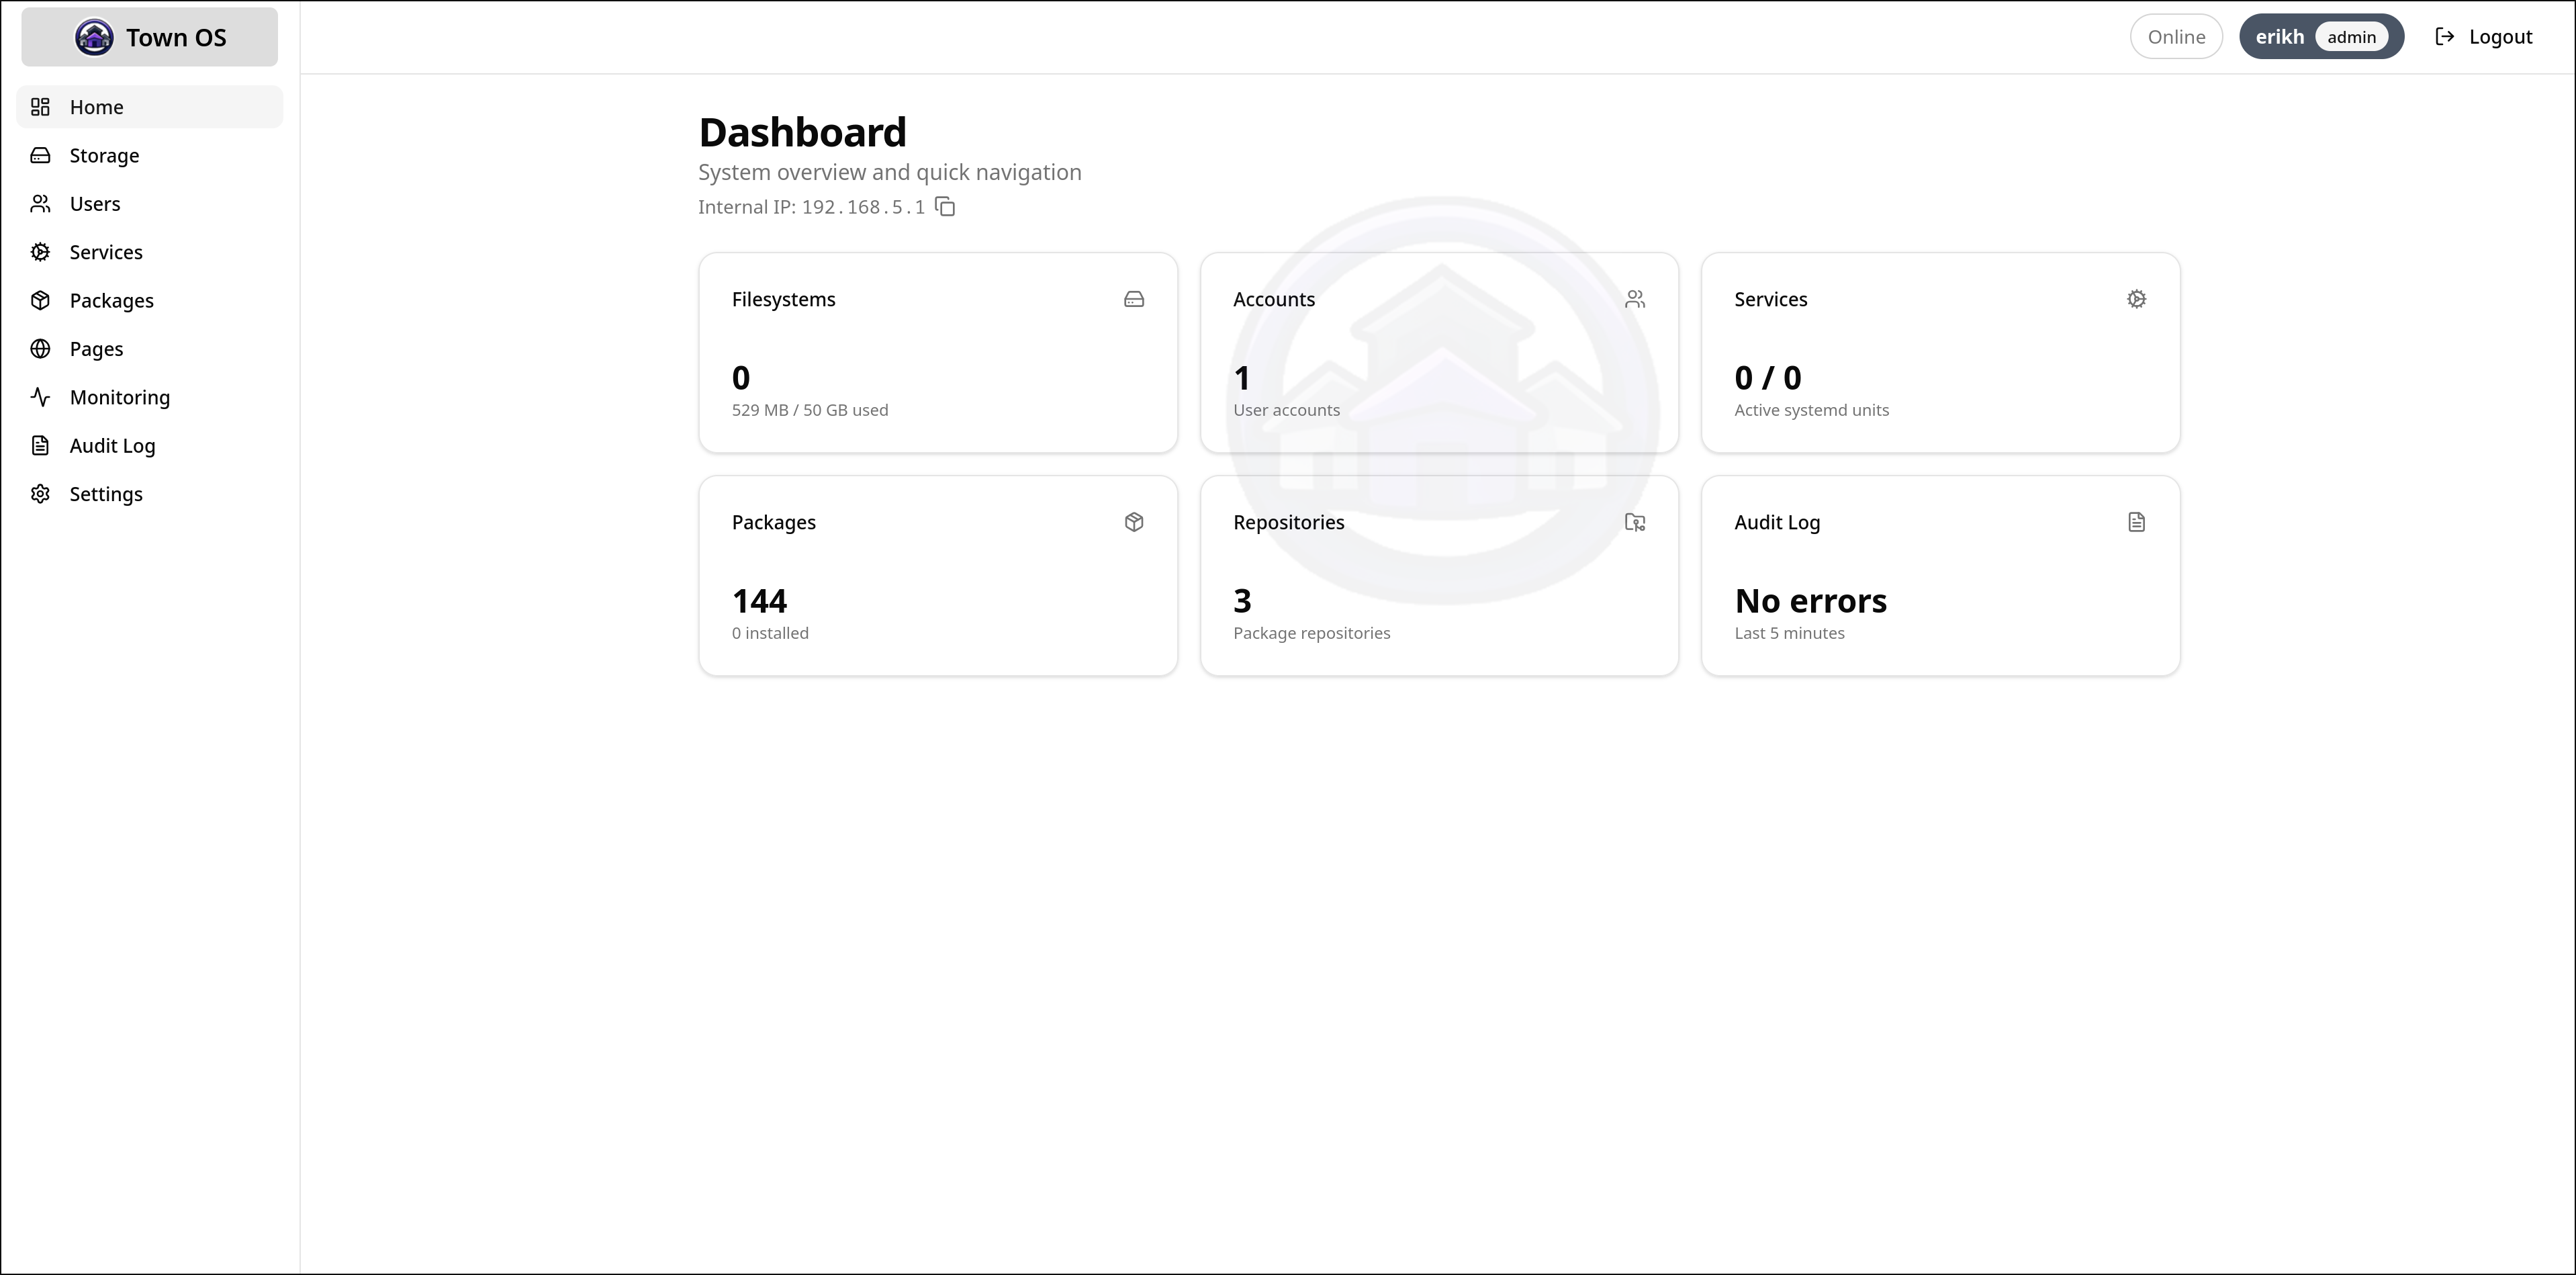
Dashboard
The dashboard shows an overview of your system — installed packages displayed as service cards with status indicators, quick actions, and system health at a glance.
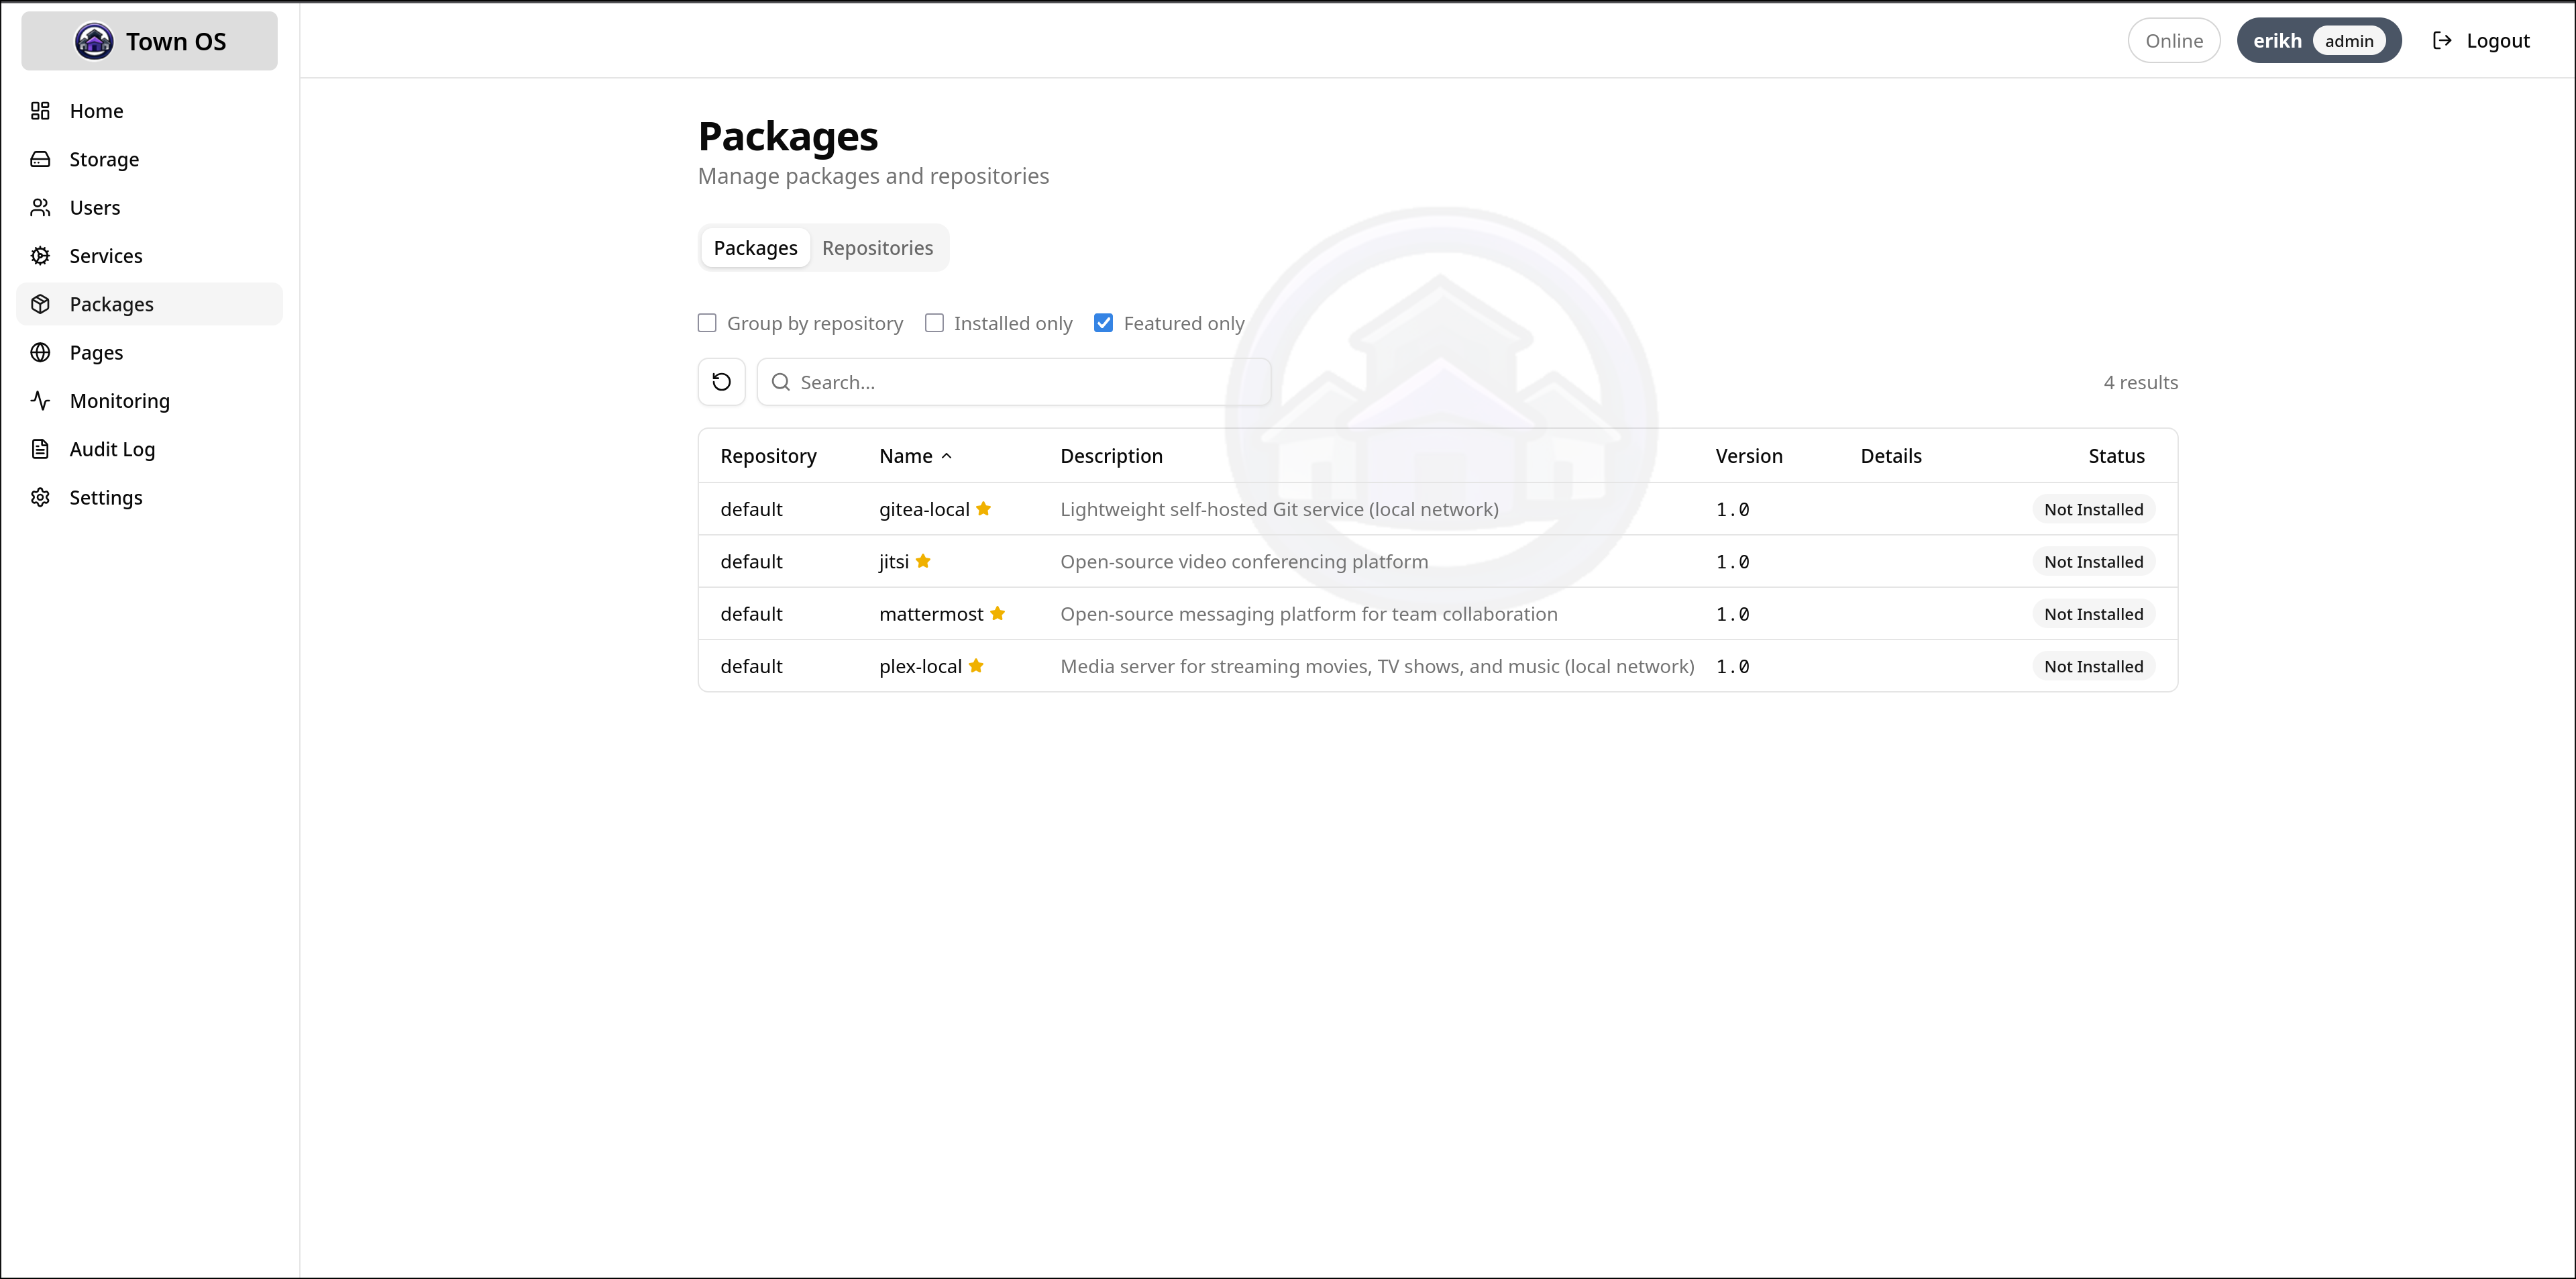
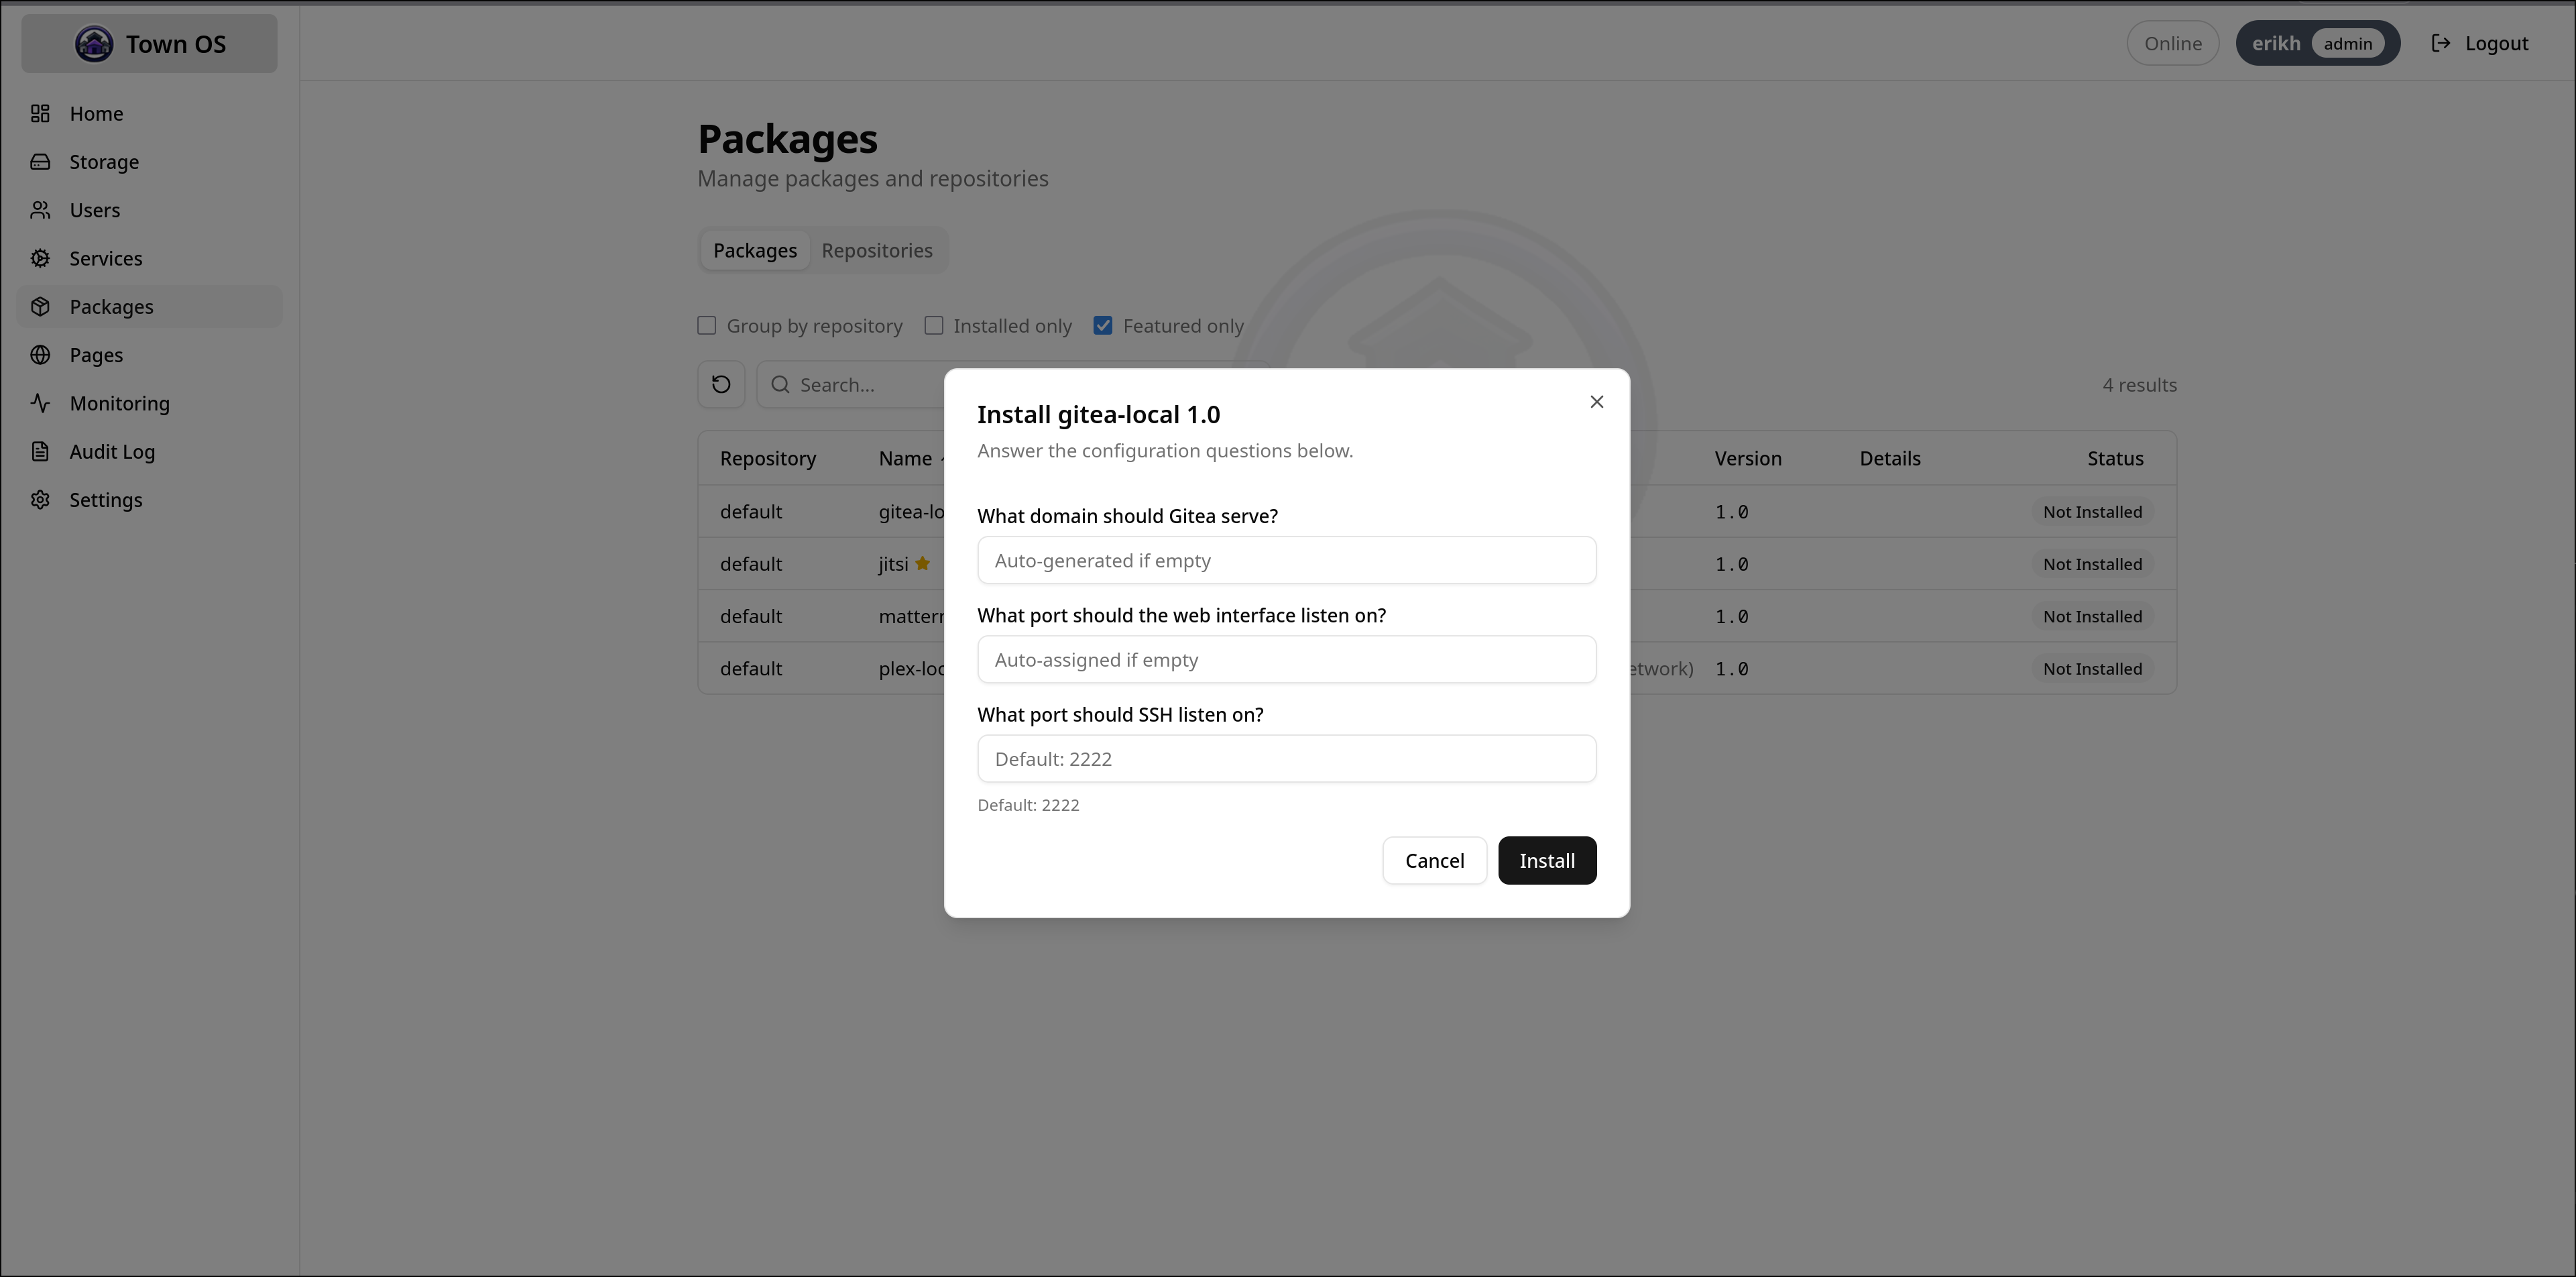
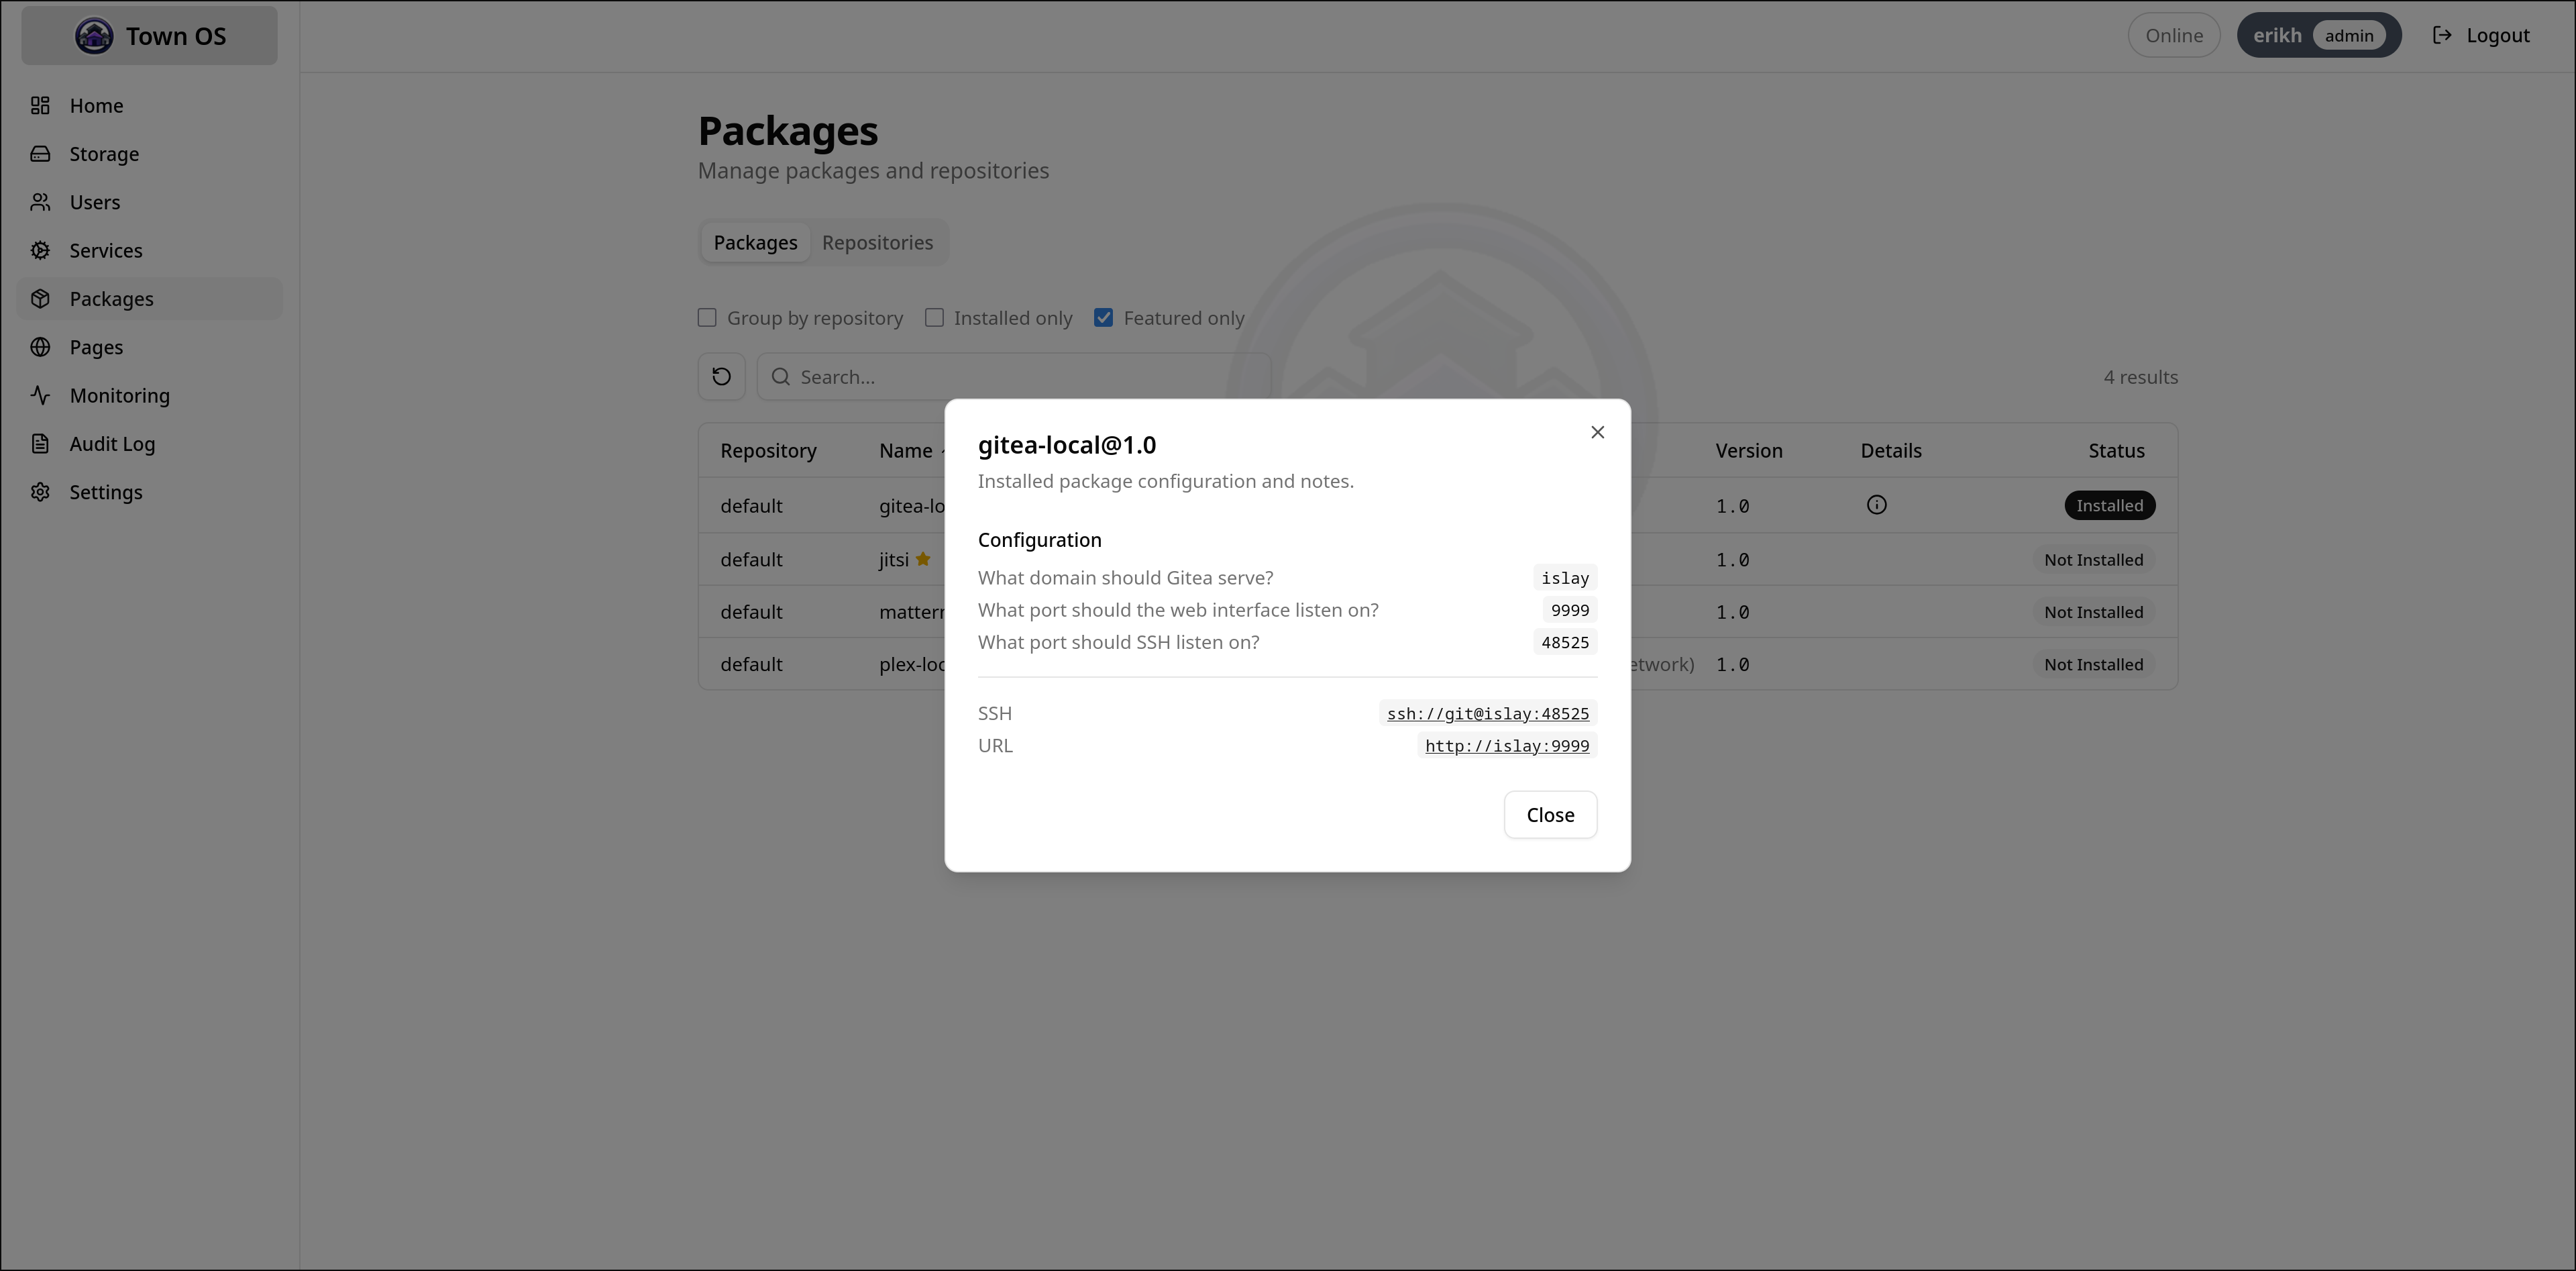
Browsing and Installing Packages
The Packages view lets you search available packages, view details, and install them with guided prompts. Each package's questions are presented as a form — fill in hostnames, ports, and other configuration, then click install.
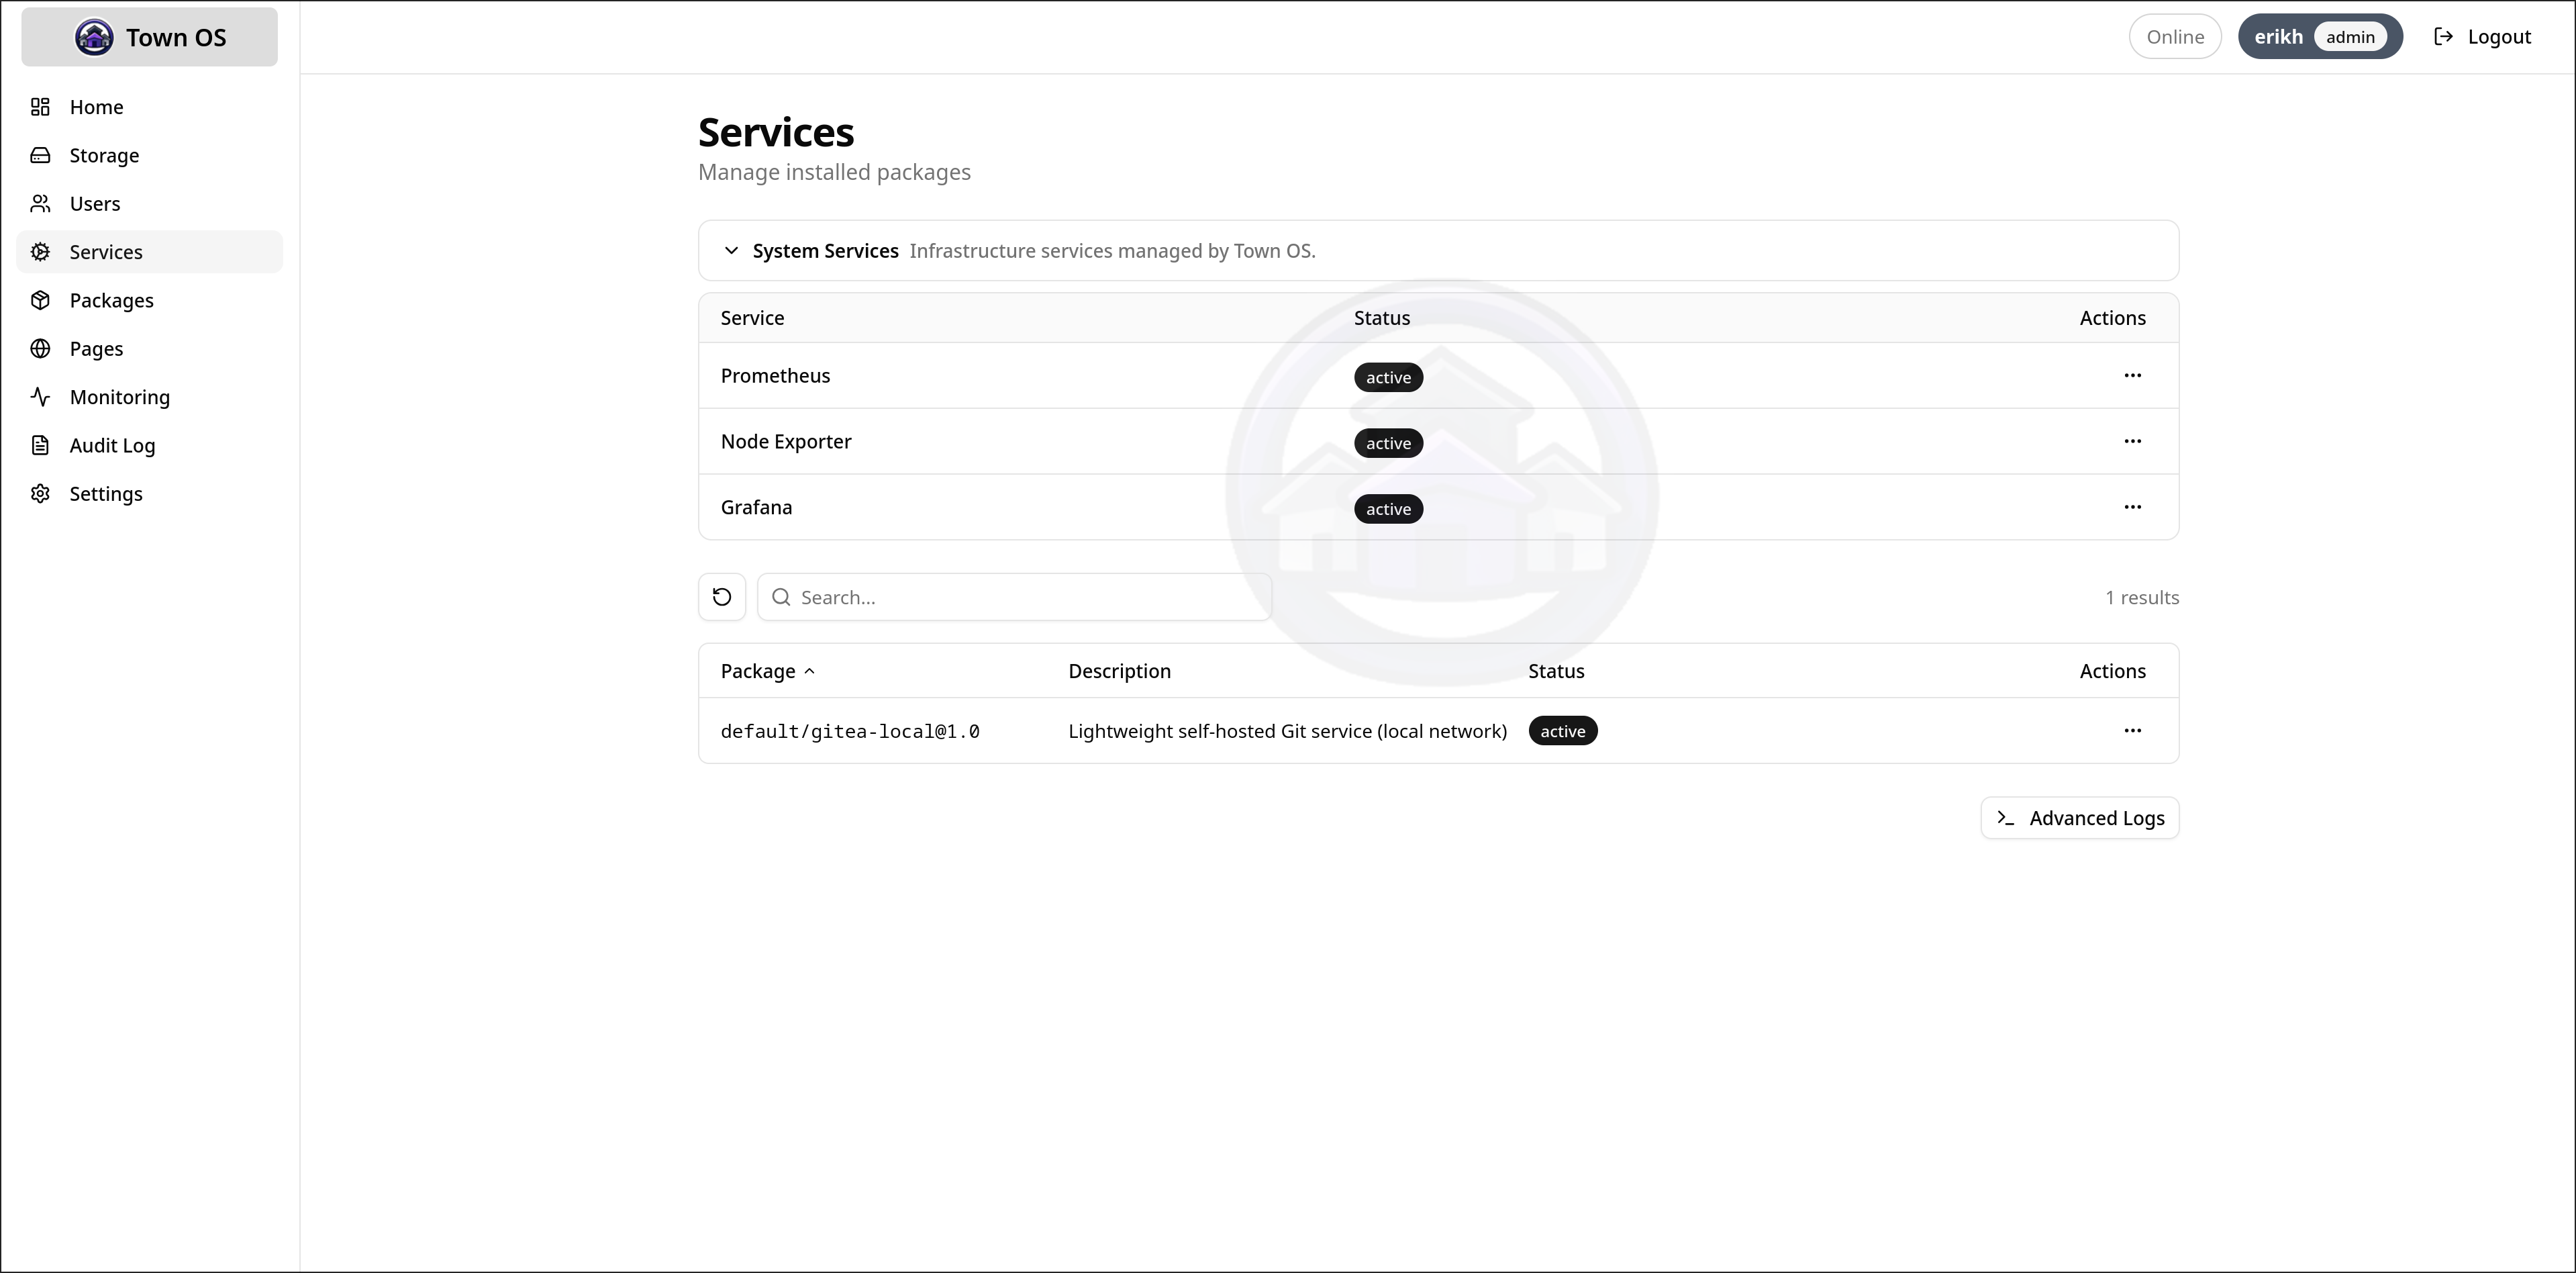
Managing Services
Installed services can be started, stopped, and restarted from the Services view. Status indicators show whether each service is running, stopped, or in an error state.
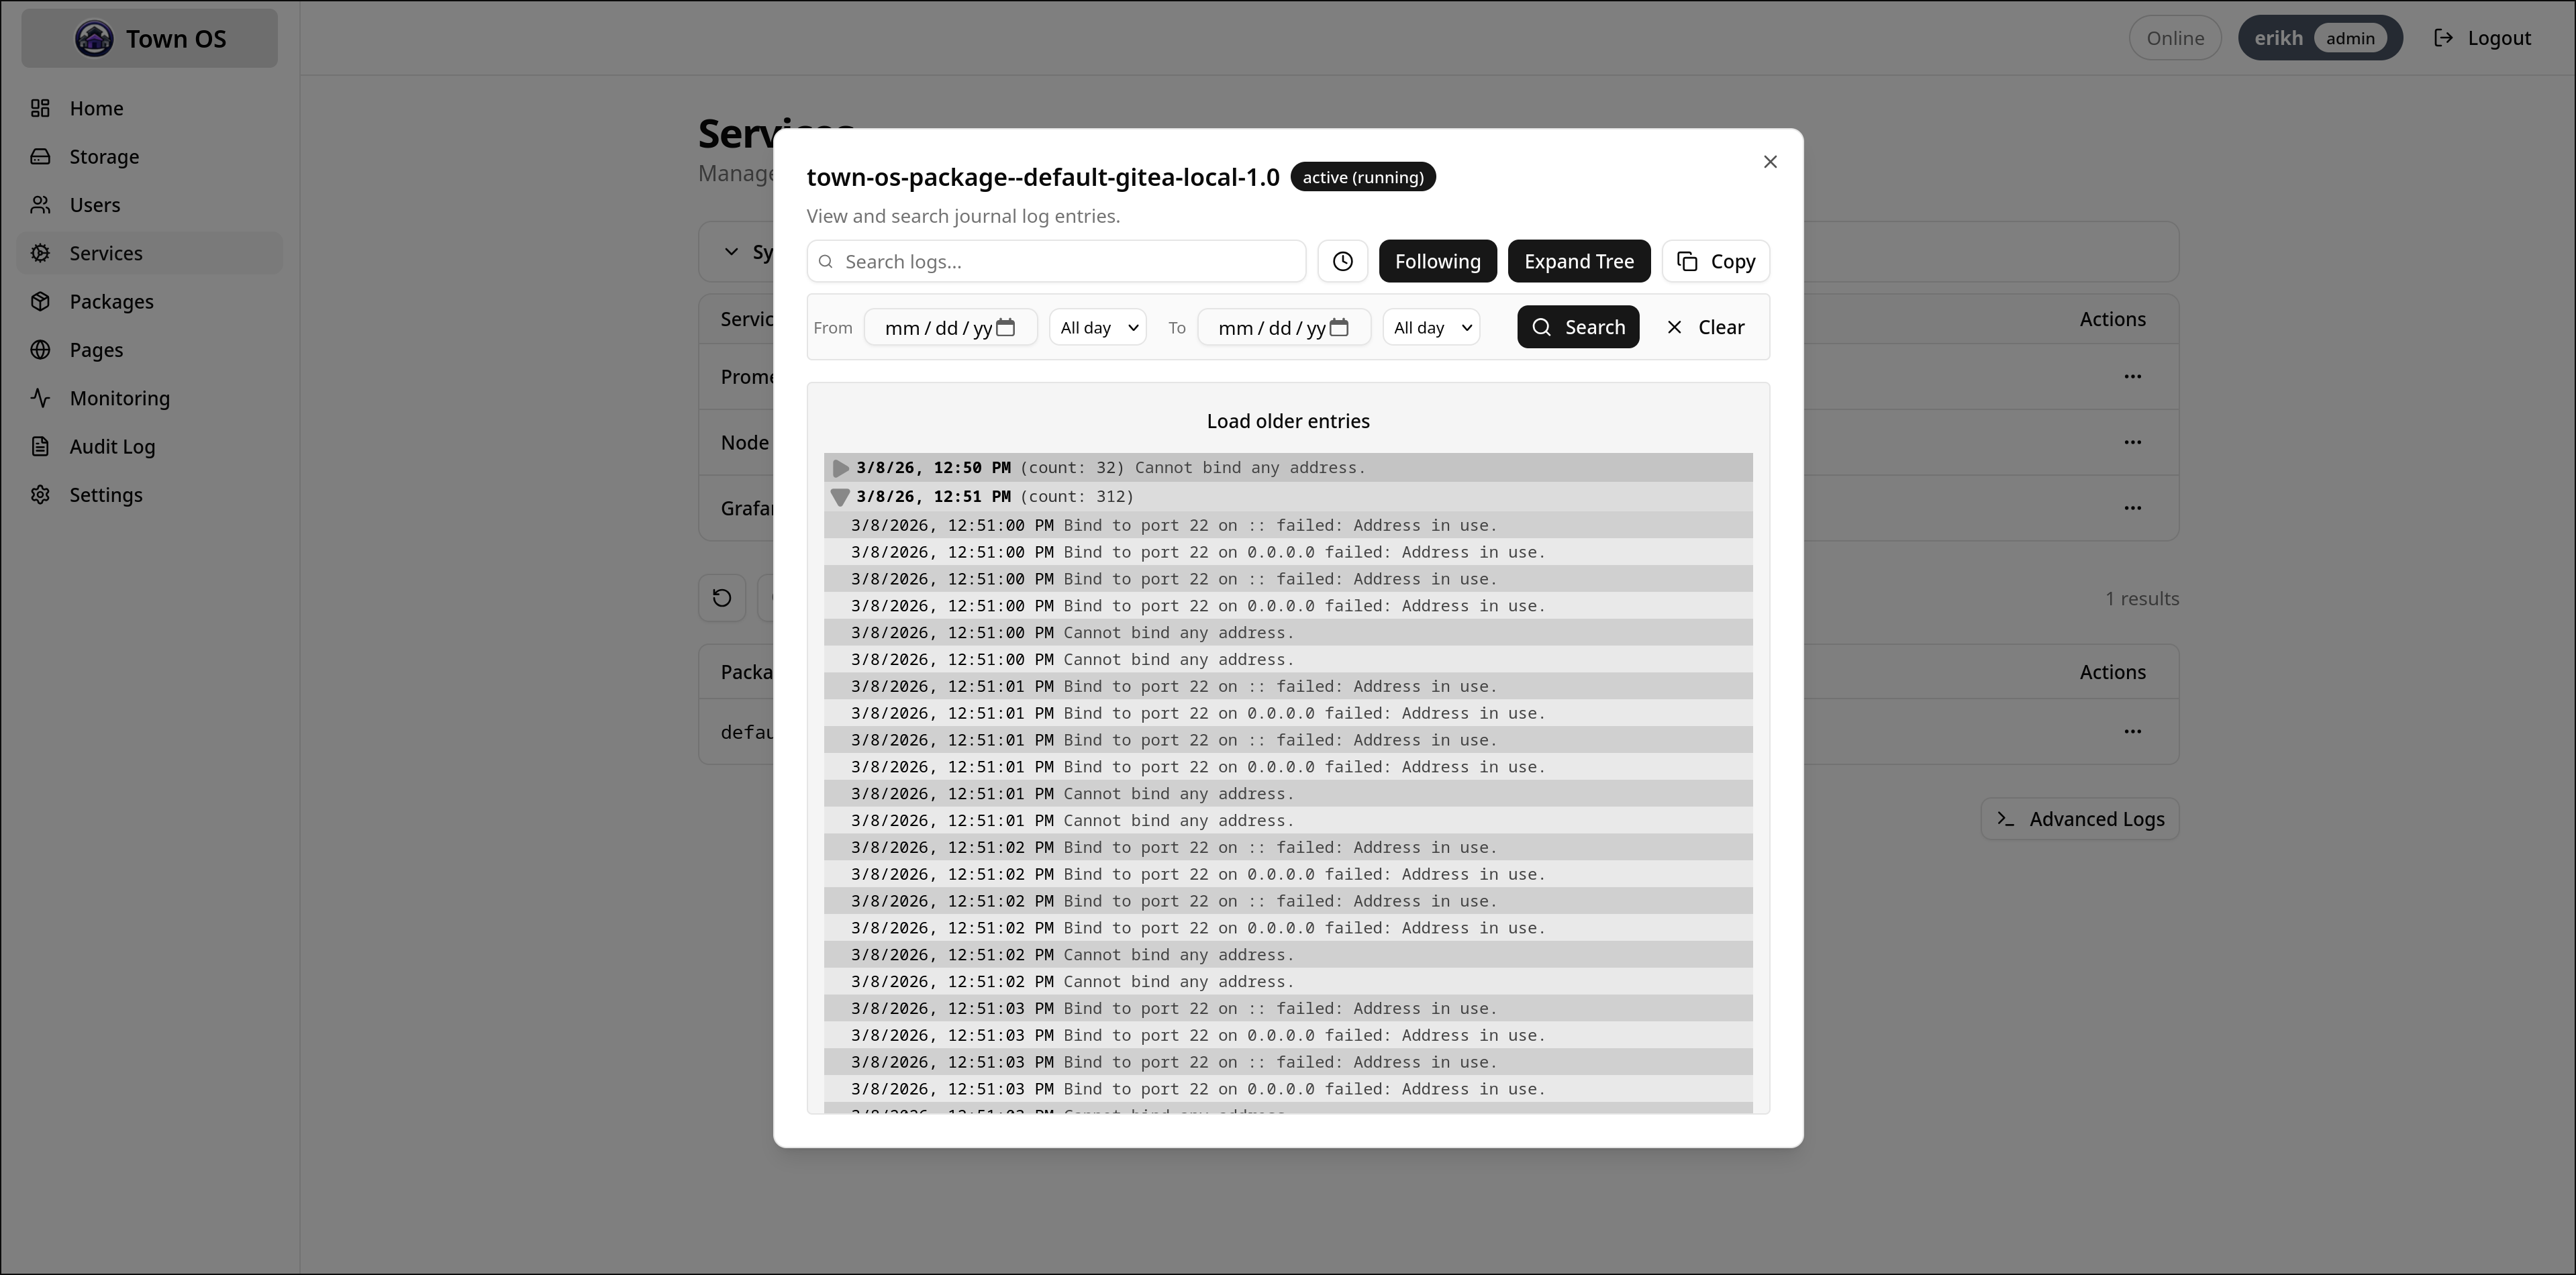
Viewing Logs
The Logs view provides live journal output with filtering and grep capabilities. You can filter by service, priority level, and search for specific text.
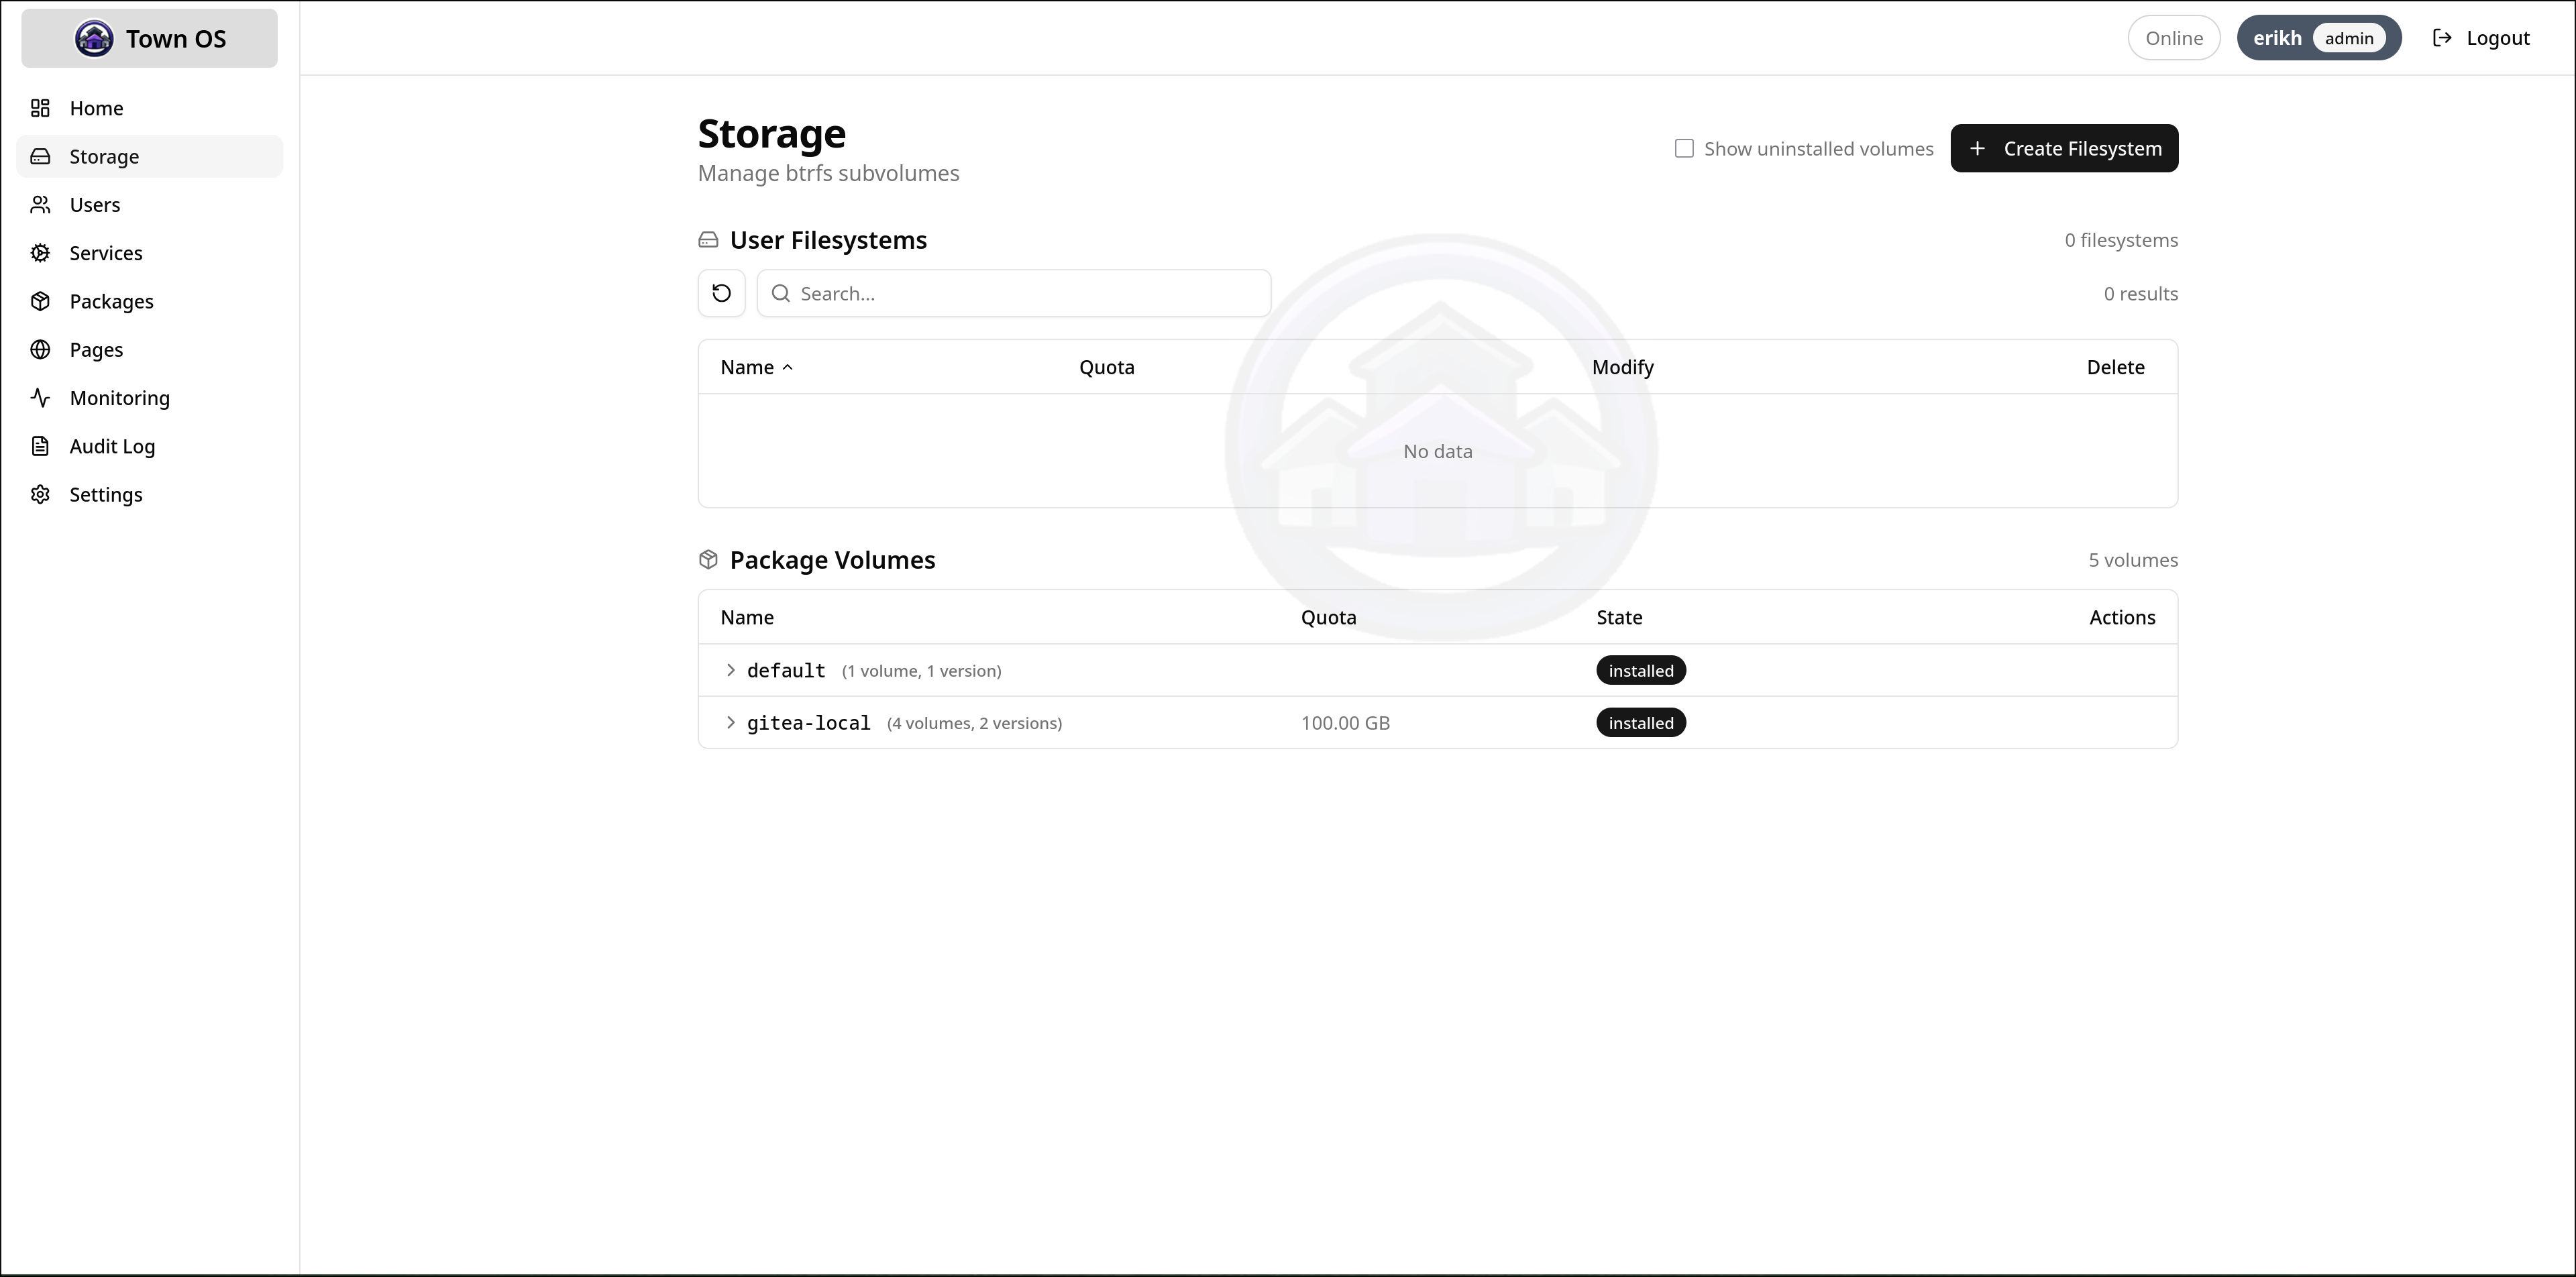
Storage Management
View and manage btrfs subvolumes, configure per-package quotas, and monitor disk usage across your storage pool.
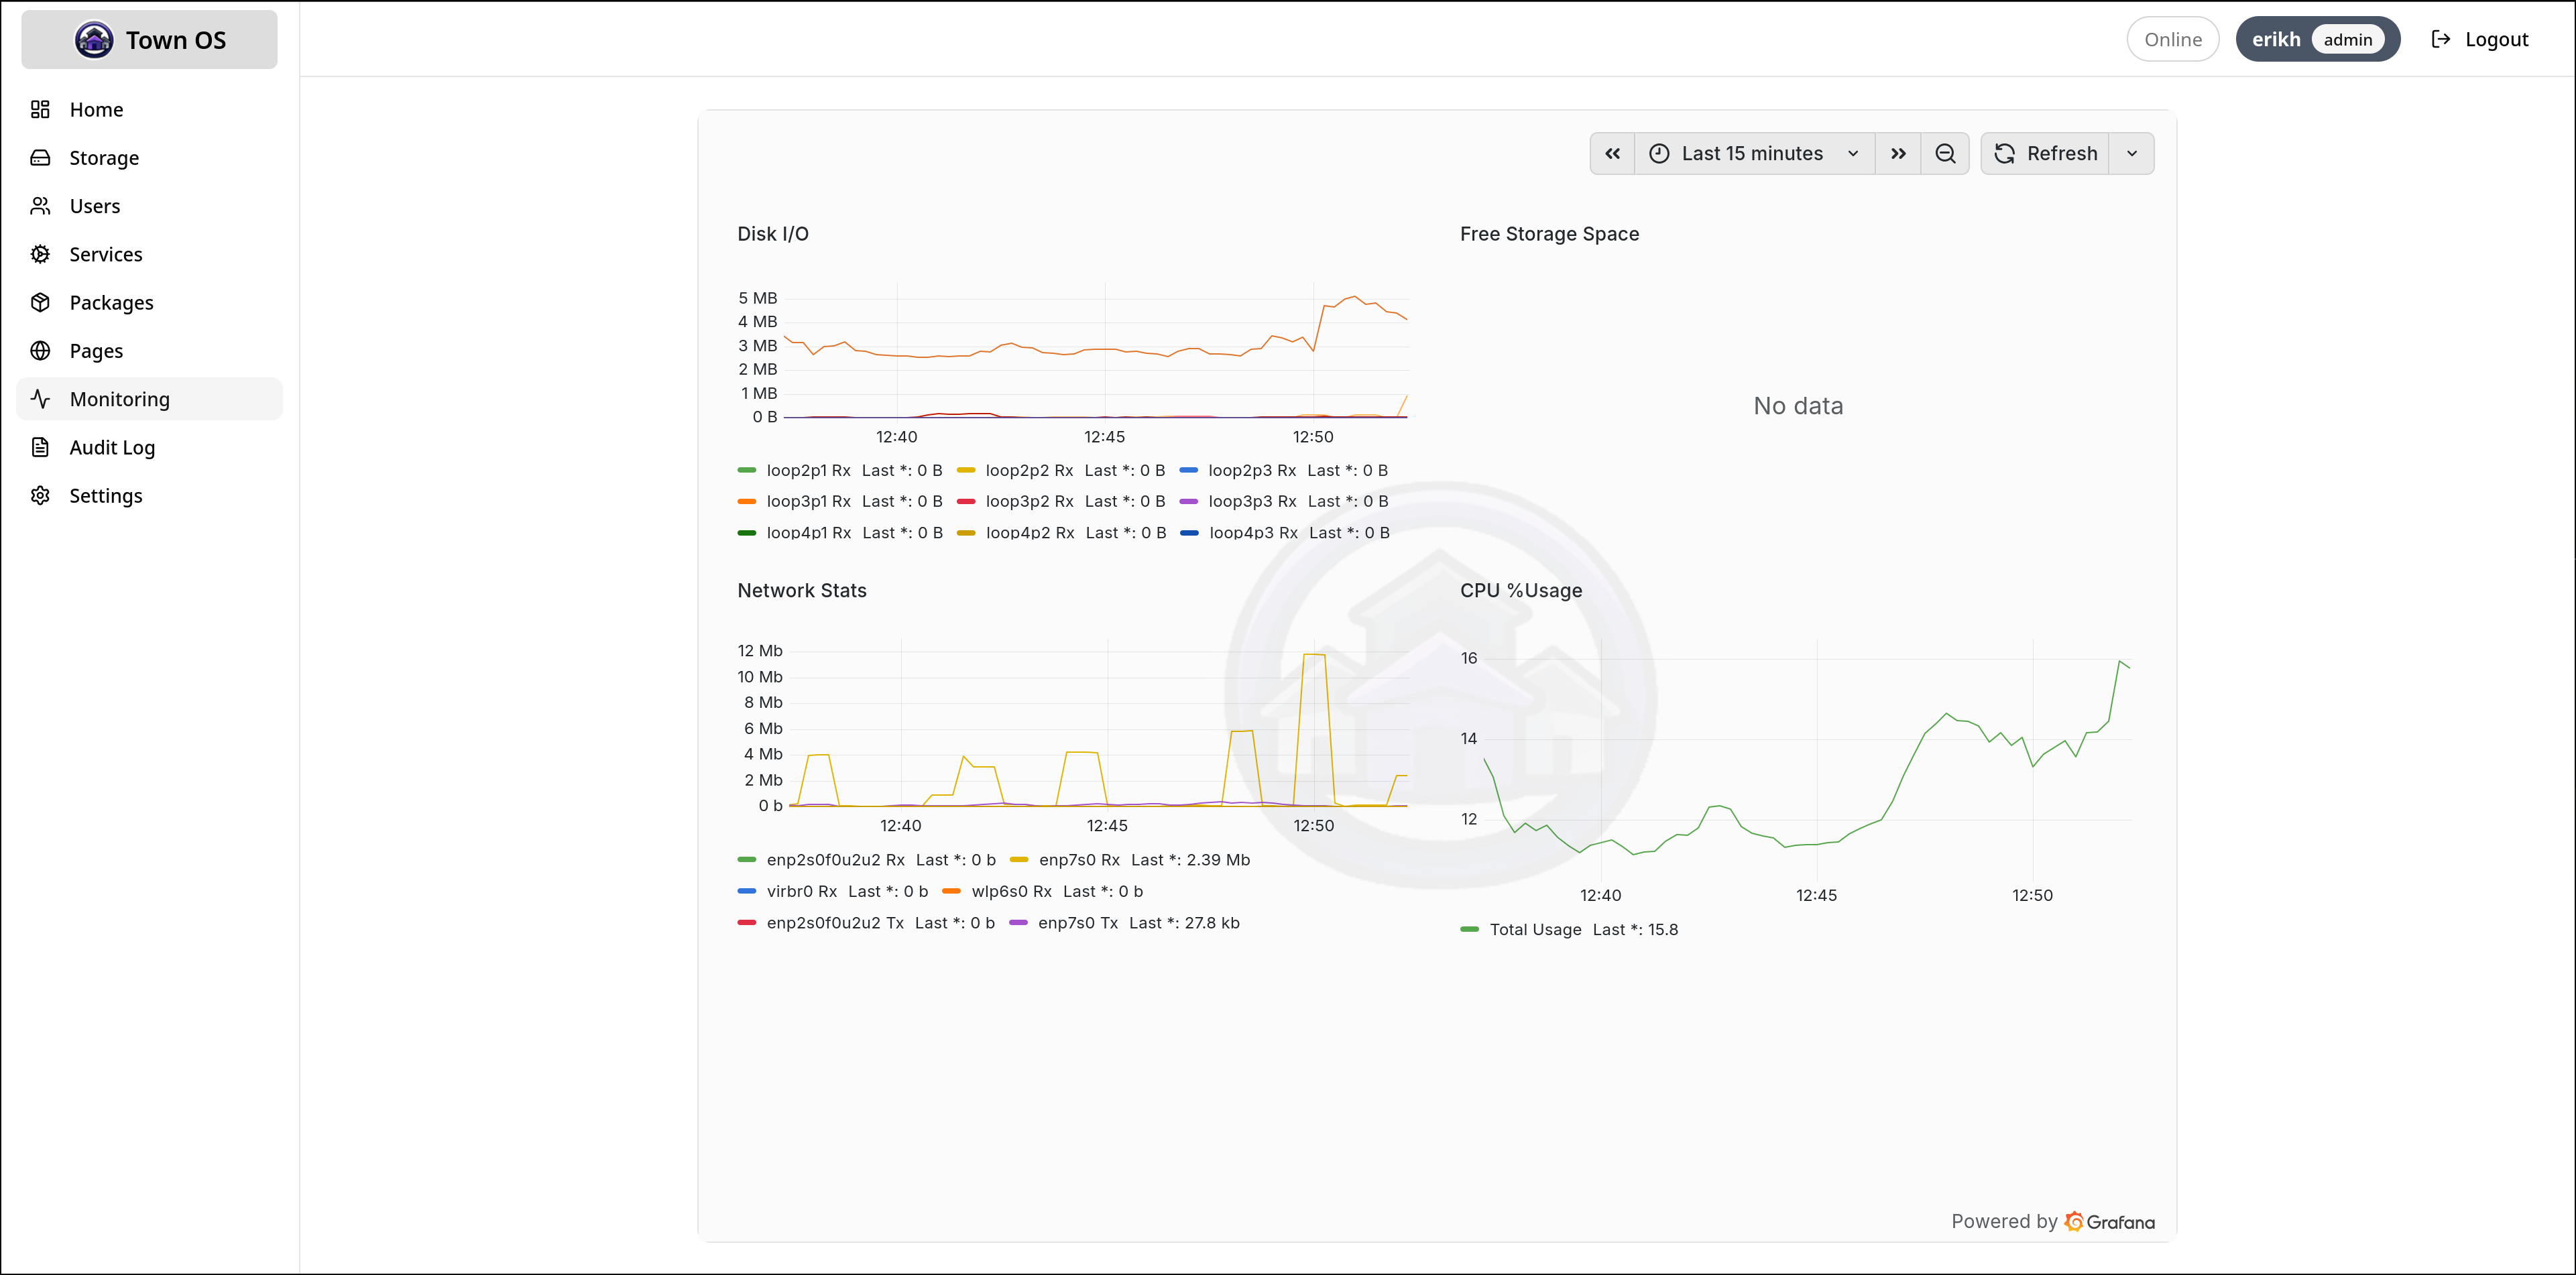
Monitoring
Town OS includes built-in monitoring with Grafana and Prometheus dashboards for tracking system metrics, service health, and resource usage over time.
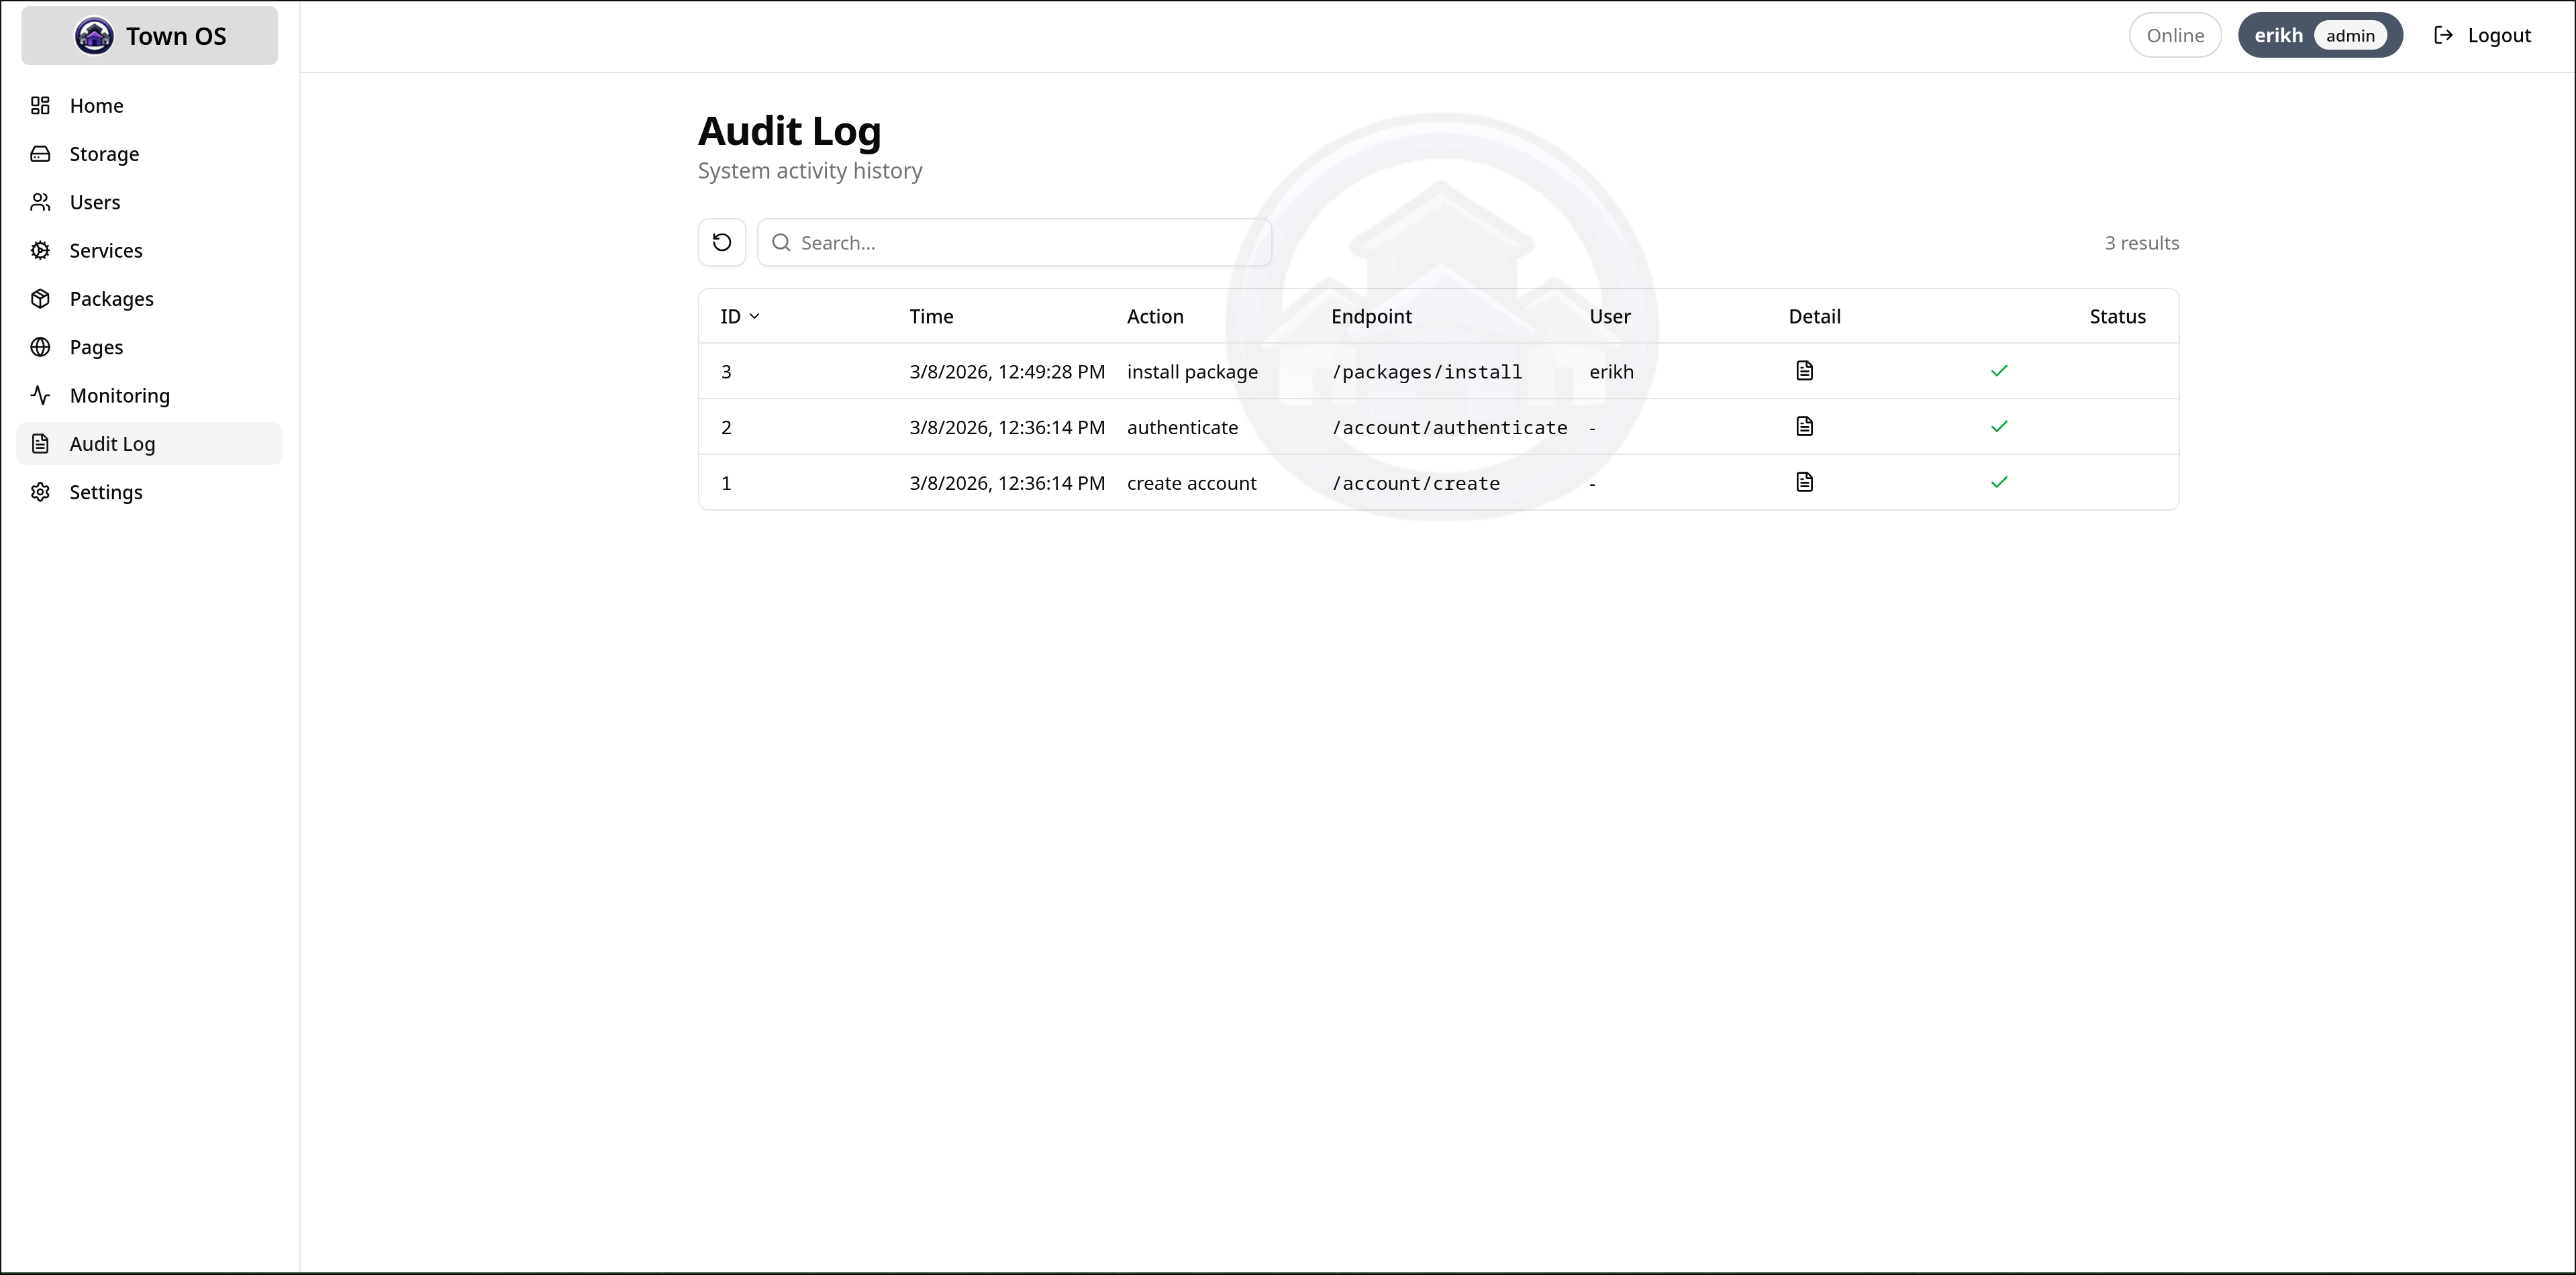
Settings and Audit Log
The Settings page lets you configure system-wide options. The Audit Log tracks every administrative action — installs, uninstalls, service state changes, and configuration modifications — so you always know what changed and when.

Building a Package
Town OS packages are YAML files that describe how to run a containerized service. For the full specification, see the Packaging Format reference. This section covers the practical workflow.
Repository Structure
A package repository is a git repository with a packages/ directory.
Each package gets a subdirectory containing versioned YAML definitions:
my-packages/
  packages/
    my-app/
      1.0.yaml
      2.0.yaml
Writing a Package Definition
A minimal package needs only an image field. A typical package
includes a description, networking, volumes, and user-facing questions:
image: myapp:latest
description: My custom application
supplies: ["http"]
network:
  external:
    "@port@": "8080"
volumes:
  data:
    mountpoint: /app/data
    quota: 5gb
questions:
  port:
    query: "What external port should this app use?"
    type: port
    default: "9000"
notes:
  URL:
    value: "http://@LOCAL_EXTERNAL_HOST@:@port@"
    type: url
Template System
Use @variable@ syntax to reference question answers and built-in
variables (@LOCAL_EXTERNAL_HOST@, @LOCAL_INTERNAL_HOST@).
Templates work in environment variables, port mappings, quotas, and note values.
Testing Locally
Use the dev environment to test your package.
Place your repository on disk, add it through the UI or
repositories.json, and install your package. The dev environment
provides the full Town OS stack for testing.
Adding a Repository
Add your package repository to Town OS through the UI
(Packages → Repositories → Add Repository) or by editing
repositories.json directly:
[
  ["default", "https://github.com/town-os/default-packages"],
  ["my-packages", "https://github.com/myuser/my-packages"]
]Things You Can Self-Host
Town OS is built to run anything that ships as a container image. Here are some ideas to get you started — many of these are available in the default package repository, and any container image can be packaged with a simple YAML definition.
Media & Entertainment
- Plex / Jellyfin — stream your movie and TV library to any device
- Navidrome — personal music streaming server
- Calibre-web — manage and read your ebook collection
Code & Collaboration
- Gitea / Forgejo — lightweight self-hosted Git
- GitLab — full DevOps platform
- Nextcloud — files, calendar, contacts, and more
- Wiki.js / BookStack — documentation and knowledge bases
Communication
- Jitsi Meet — private video conferencing
- Matrix / Synapse — federated encrypted chat
- Mattermost / Rocket.Chat — team messaging
Game Servers
- Valheim, Minecraft, Terraria, Satisfactory dedicated servers
- Proton/Steam support via GloriousEggroll containers
- Any game server that ships as a Linux binary or container
Home Automation
- Home Assistant — smart home control hub
- Node-RED — visual automation workflows
- Mosquitto — MQTT broker for IoT devices
Privacy & Security
- Pi-hole / AdGuard — network-wide ad blocking (note: rolodex already provides this)
- WireGuard / OpenVPN — VPN servers for remote access
- Vaultwarden — self-hosted password manager
Productivity
- Paperless-ngx — document management and OCR
- Immich — self-hosted photo and video management
- Planka / Wekan — kanban boards and project management
Development Environment and Test Suite
The Town OS development environment runs the full stack locally using Podman containers. This is the fastest way to test changes, develop packages, and run the test suite.
Prerequisites
- Linux — required for btrfs and Podman rootless containers
- Podman — container runtime (rootless mode)
- Go 1.25+ — for the backend API server
- Bun — for the frontend build and dev server
- btrfs-progs — for storage management
Starting the Dev Environment
git clone https://gitea.com/town-os/town-os.git
cd town-os
make dev
This starts the full development stack with hot-reloading. Once it's ready, open the URL printed in the terminal to access the Town OS dashboard.
Dev Environment Commands
| Command | Description |
|---|---|
make dev | Start the full dev environment |
make dev-stop | Stop all dev containers |
make dev-logs | Tail logs from dev containers |
make dev-clean | Remove dev containers and volumes |
Running Tests
| Command | Description |
|---|---|
make test | Run unit tests |
make test-integration | Run integration tests (requires privileged Podman) |
make test-ui-integration | Run UI integration tests |
make test-full | Run all tests (unit + integration + UI) |
make auto-test | Watch for changes and re-run tests automatically |
Integration Tests
Integration tests run inside a privileged Podman container that provides a real btrfs filesystem, systemd, and Podman-in-Podman. This ensures tests exercise the same code paths as a production installation. The test container is ephemeral — it's created fresh for each test run and cleaned up afterward.
Reporting Bugs
Found something broken? Good bug reports help fix issues faster. Here's how to gather the information needed and file an effective report.
Gathering Logs with the API
Town OS exposes journal logs through its REST API. You can use Claude Code to connect to the API and generate a summary of recent errors:
# Fetch error-priority journal entries from Town OS
curl -s http://town-os.local:5309/api/systemd/logs/tail?priority=err | jq .
Or use Claude Code to summarize errors interactively:
# Example Claude Code prompt:
"Connect to the Town OS API at http://town-os.local:5309
 and fetch the last 100 error-priority journal entries from
 /api/systemd/logs/tail. Summarize the errors, group them
 by service, and suggest likely causes."
Filing an Issue
File issues on the Town OS Gitea instance at gitea.com/town-os/town-os/issues.
What to Include
- Journal summary — error log output or a Claude Code summary of recent errors
- Reproduction steps — what you did to trigger the problem, step by step
- Town OS version — the build date or commit hash from the boot screen
- Storage backend — btrfs, btrfs-mdadm, or ZFS, and how many disks
- Environment — physical hardware, QEMU, or VirtualBox; RAM and disk sizes